New Passion Unlocked: Crafting My Own Scented Candles
Hello everyone! I hope you are well and enjoying a beautiful and sunny weekend wherever you are. ✨
At the moment this post will be published, I am visiting some relatives and helping them promote their new chalet by recording videos and making promotional ads for them. But even if I am quite busy lately, I wanted to share an activity that brought lots of smiles to my face because I've wanted to get myself a DIY Kit for making candles at home for at least 3 years now, but I've been constantly discouraged by how popular this kind of businesses are.
Funny thing is that even if I had a quick thought about how it would be to sell candles, I've never really taken it too seriously, so I don't know why I've let myself get constantly discouraged by all the businesses out there that are selling candles. I know it makes no sense, but for an ADHD mind, it's easy to get influenced and scared by situations that are not directly linked to you.
Anyway, my bf was the only person who constantly supported me when it came to trying new activities or getting new things that could make me happy, so he said he would make this kit as a present for me. We weren't celebrating anything, but in fact, we are used to making gifts to each other spontaneously rather than when everyone expects us to. The surprise is a lot bigger and more exciting.
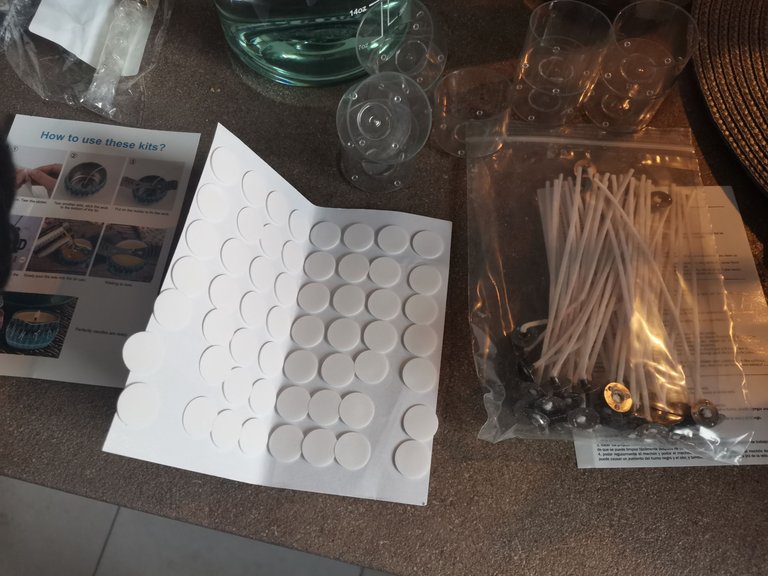
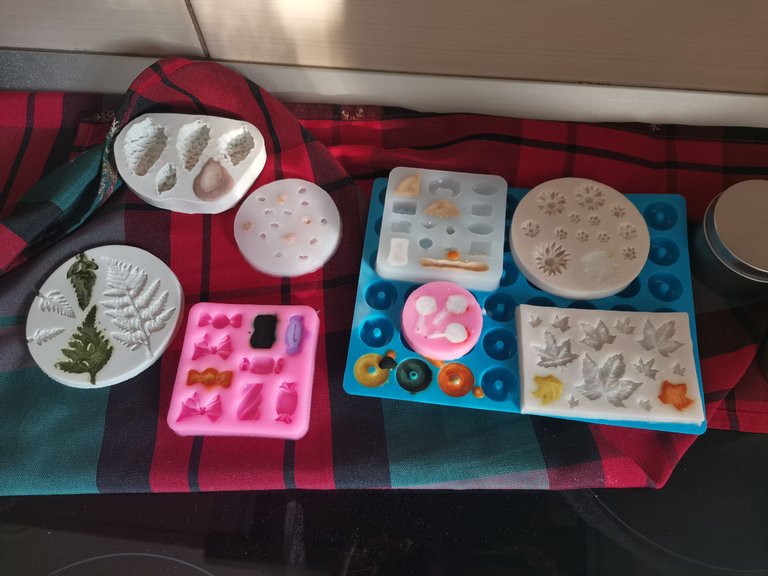
In the kit I got there were 500g of BeesWax, 2x dyes, 2x essential oils, a spoon, the recipient where you will melt the wax, some forms to use for the candles and plenty of candle wicks and adhesive for these.
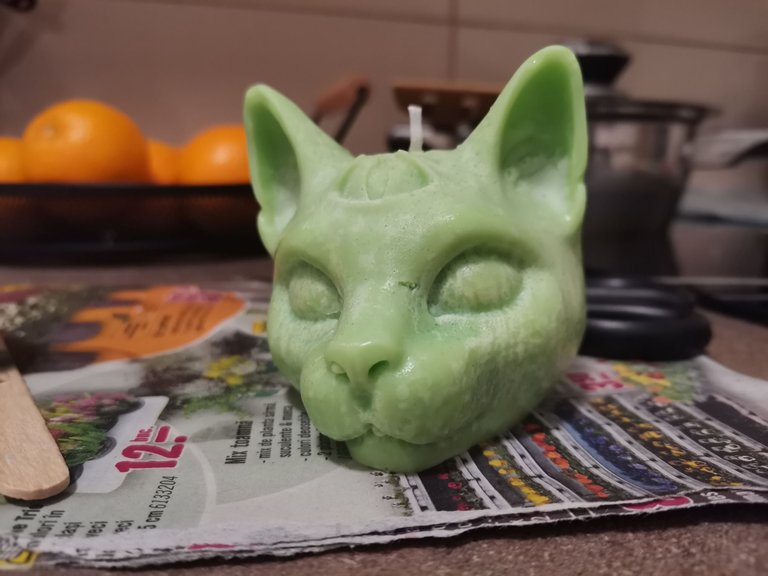
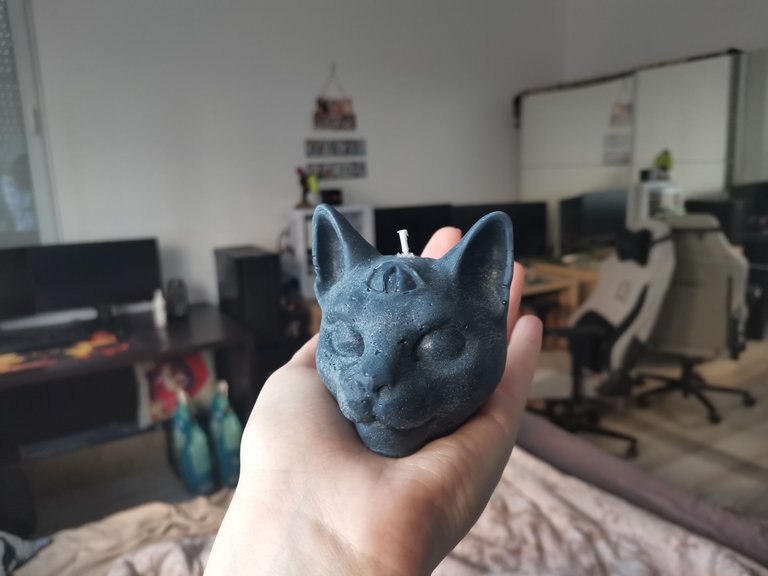
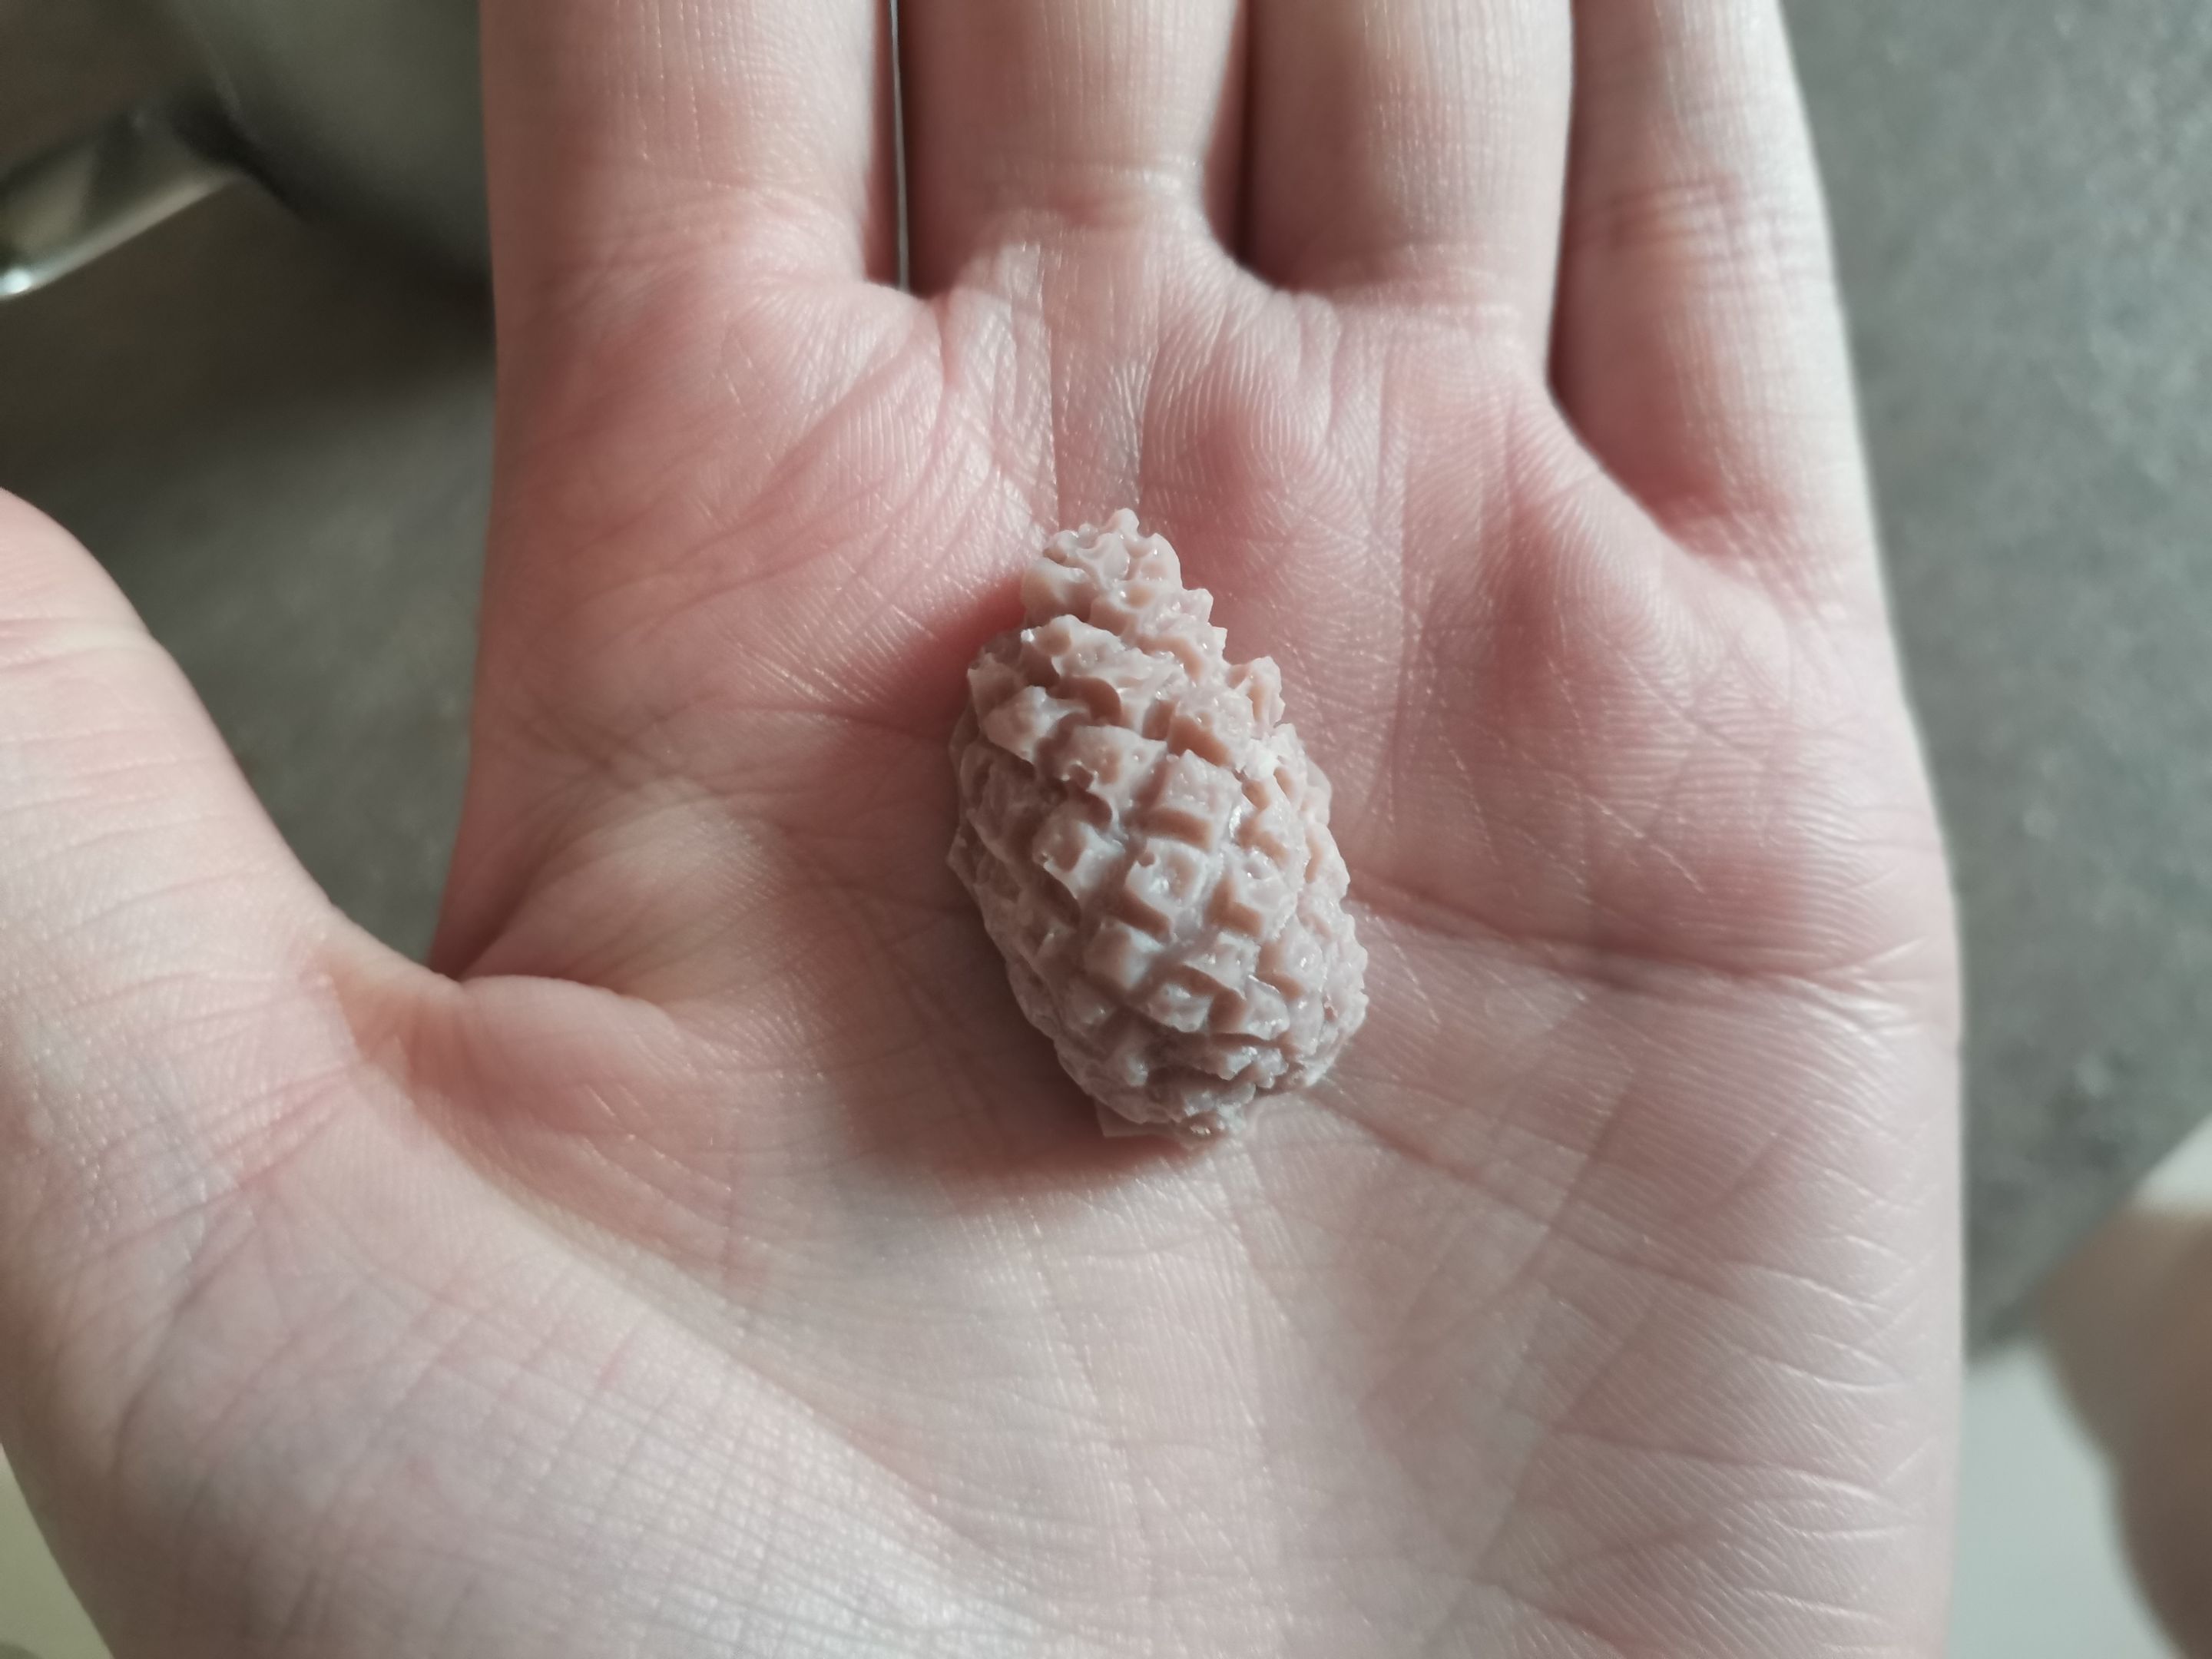
Even if it's good to start with small steps, as a cat mom who was looking to practice the new passion in that direction, I got myself a mold with a cat shape.
When I tried to make my first candles it was somewhere in March when I planned to get 5 different colors and scents for the cat shaped candles which were going to be a gift for my parents, my sister, my bf and I, but sadly I failed taking pictures of the overall process back then because I was very stressed not to mess things up, especially that it'a a very mathematical activity where you have to pay attention on a lot of details such as:
- the melting temperature
- the temperature of the candle when you pour the essential oil
- how many ml of oil you are using
- how much wax you need to melt, as the weight in grams is not the same as how much water you get to fill the mold
- the temperature when you add the dyes
- how much dye should you use
- the temperature when you pour the overall composition into the mold
- how you pour it to avoid creating air bubbles or having some of the wax already harden in the pot
...and lots of other details I'm sure I forgot to mention.
I'm not complaining, but what I'm trying to say is that every single activity would always require a lot more effort than what people from the outside think about.
However, as a person who loves art in all its forms and also challenges, this process made me even more determined to try more techniques until I felt like I had made some progress.
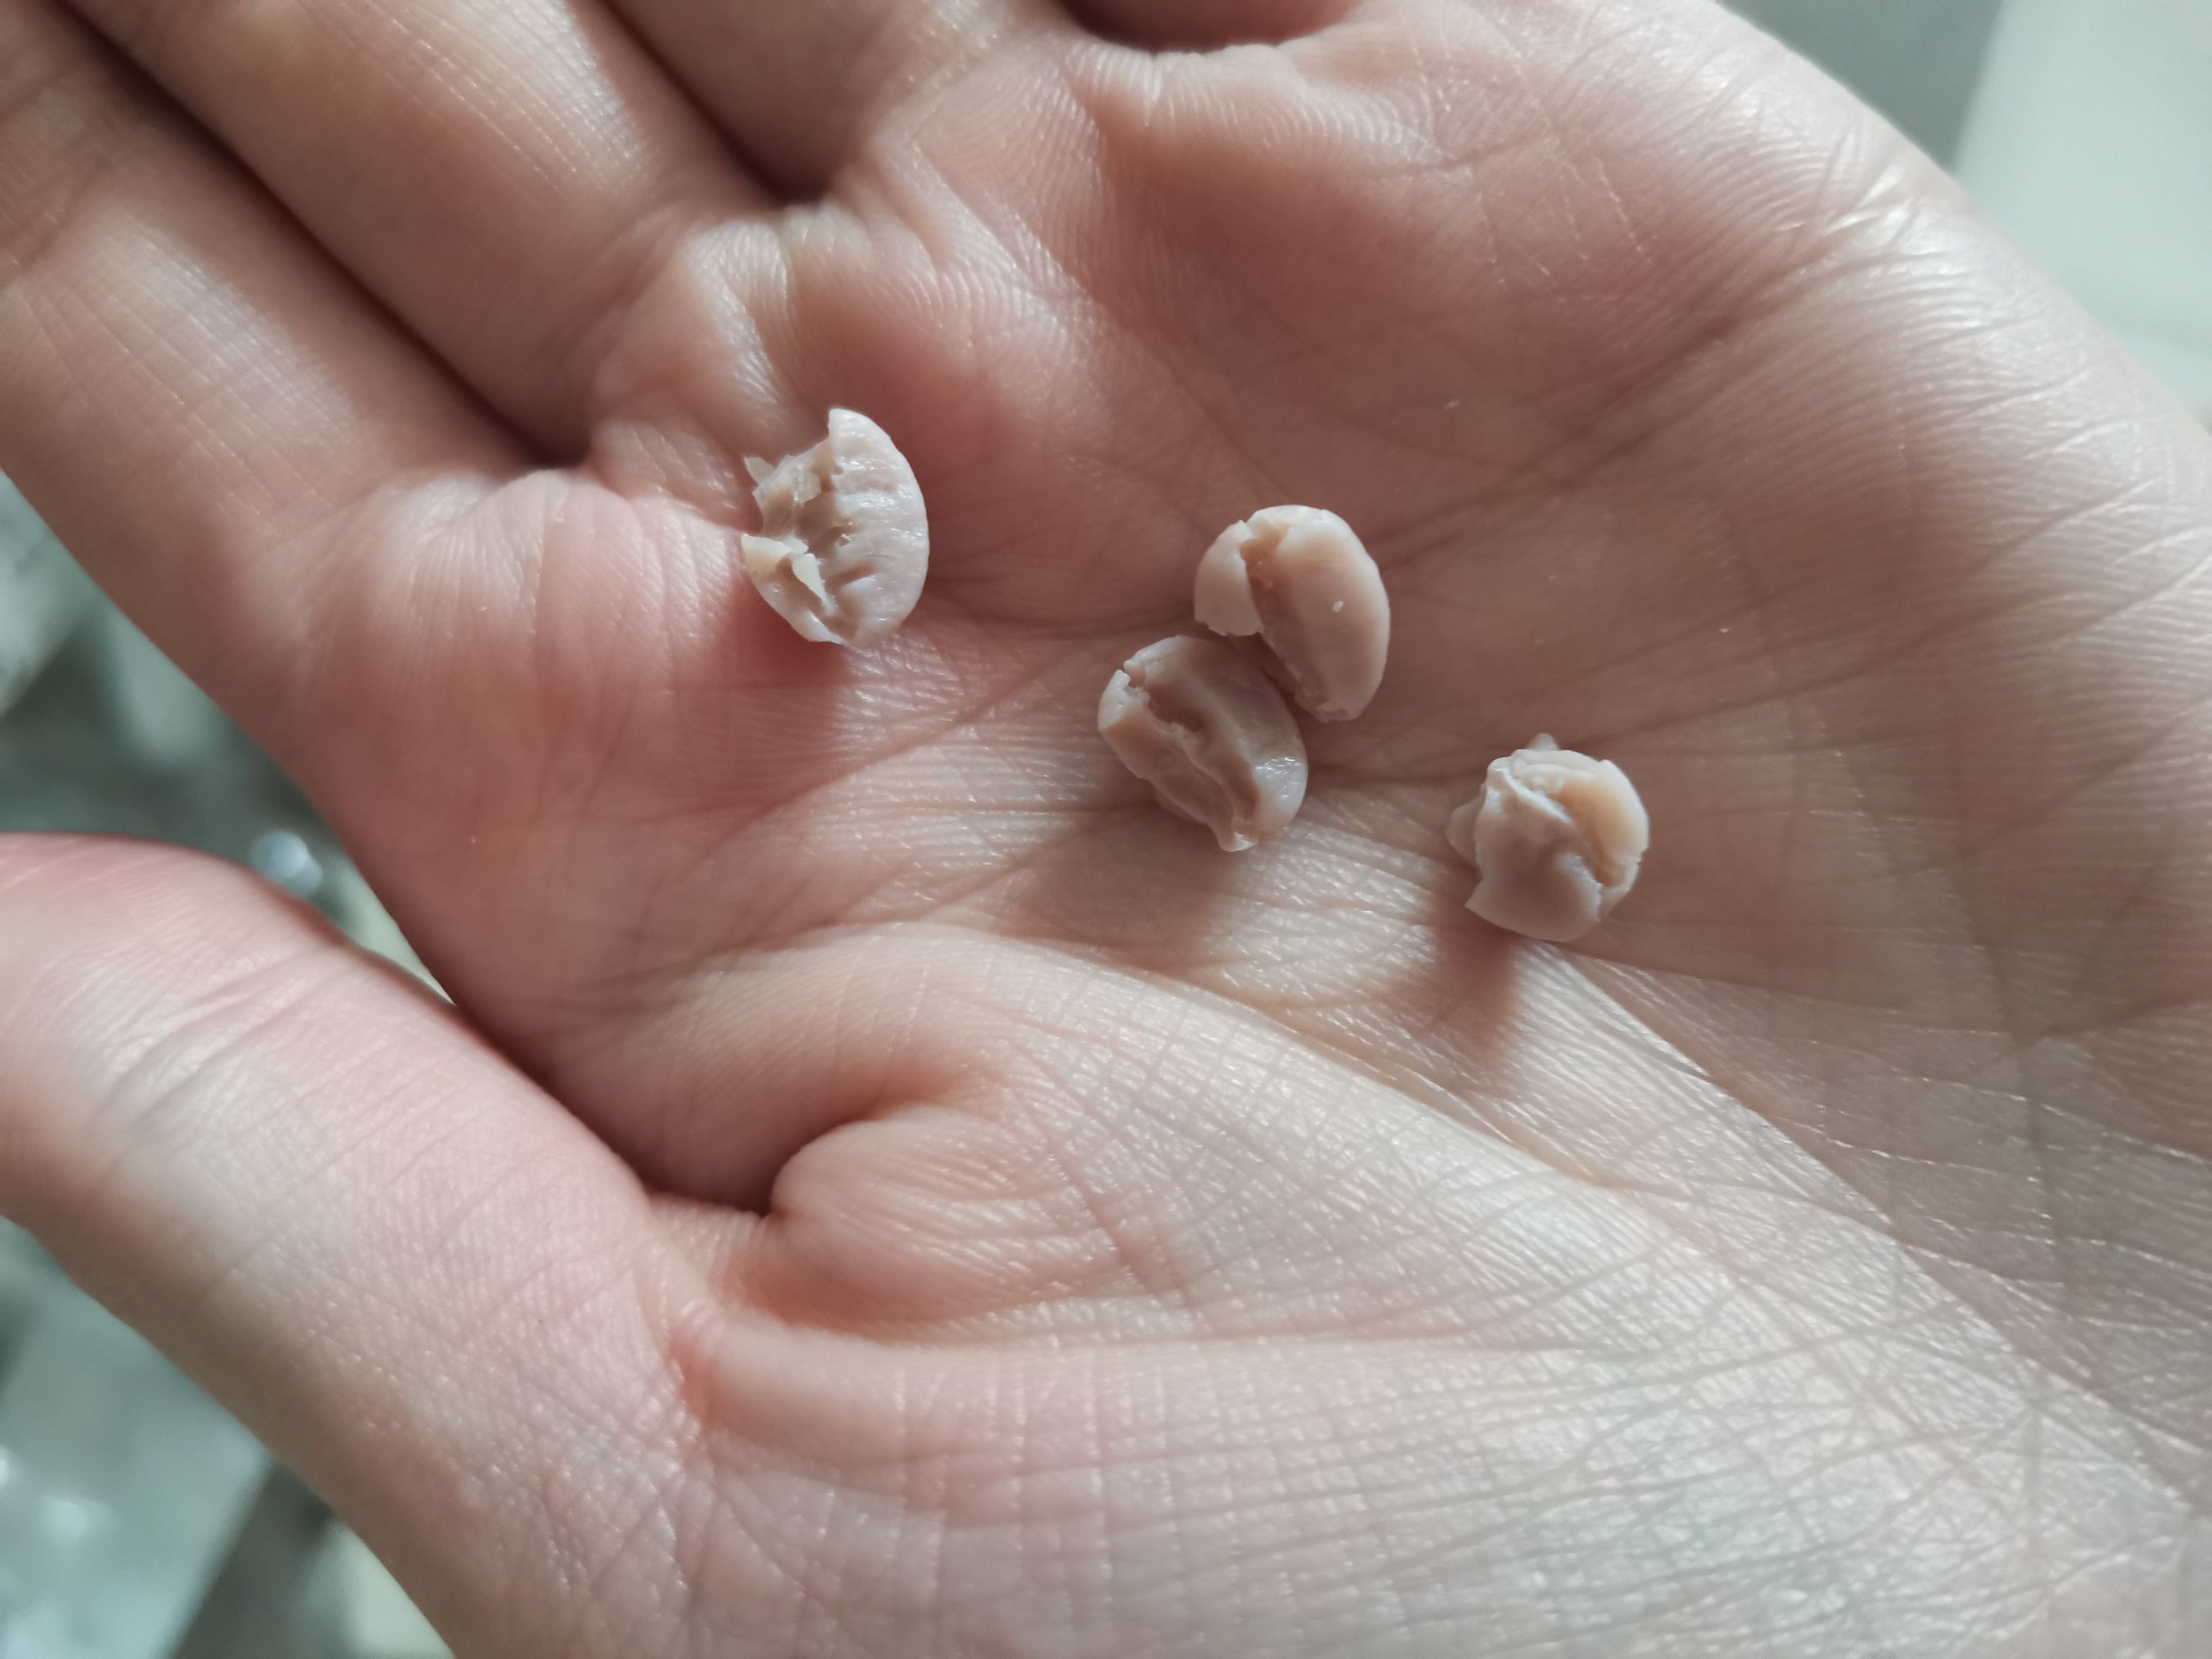
That's how I ended up melting the same candle and recreating it even 3 times before moving on to a different one, because of having parts of the candle break when taking it out of the mold or when there were too many air bubbles formed inside.
As I said, I was doing this activity somewhere in March, and I am living in the basement where the temperature is a lot colder than any other studio room or apartment, so another issue I encountered was getting parts of the candles frosty.
About this thing, I've read lots of opinions, such as you could use a heart gun to melt them or add coconut oil on top of it. Sadly, none of them worked for me as the coconut oil was giving a really strange look, and the heat gun was ruining all the details of the candle. This is indeed a solution, but for fixed shapes, such as having your candle in a jar.
With this thought I've put my passion on hold for a couple of months until a few days back when I decided to do some more candles but in a whole new way, where the base would be part of a jar and have lots of other small elements (still made of wax) on top of it, sort of representing the story and scent of each candle created.
I've also read that some of the final results a candle can get can be, literally, influenced by anything: from the type of wax used to the dyes, from the oils to even the molds themselves. All of these on top of all the other things mentioned before, with the temperature and quantity of dyes/wax/oil you are using for each candle.
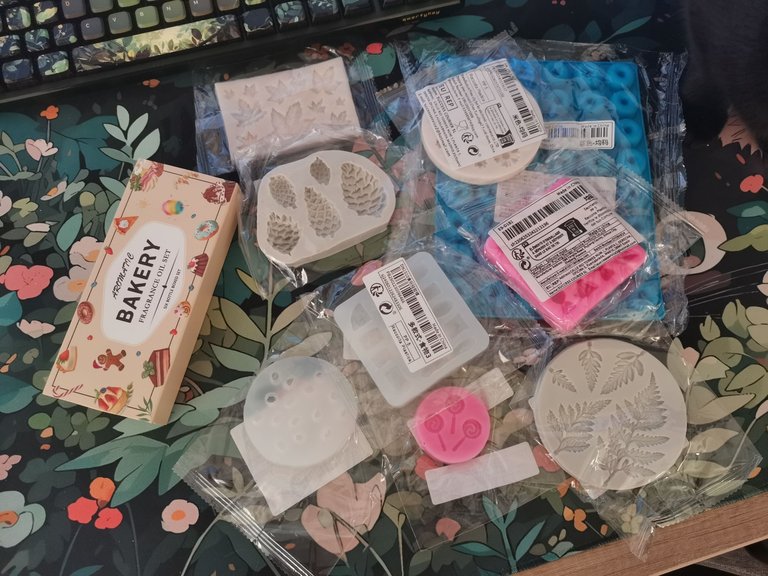
With this thought, I've got myself Soy Wax to work with, new essential oils, but also plenty of new dyes that were shards instead of powder or liquid dye.
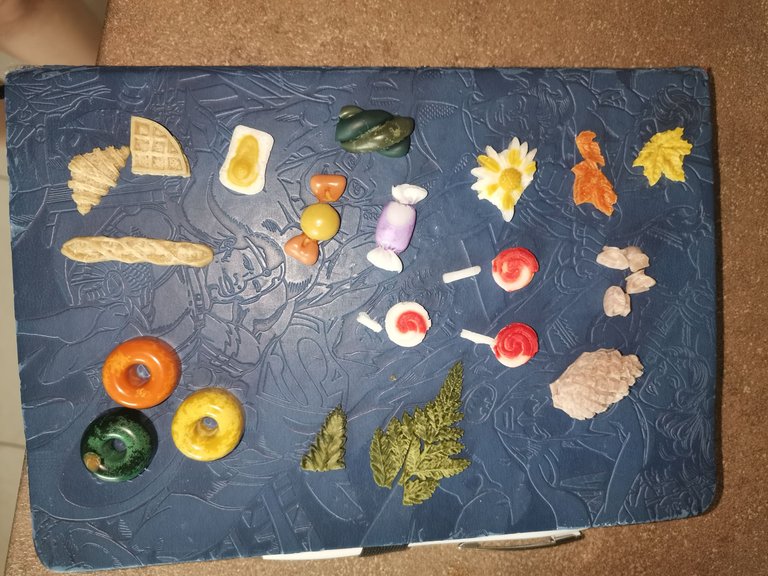
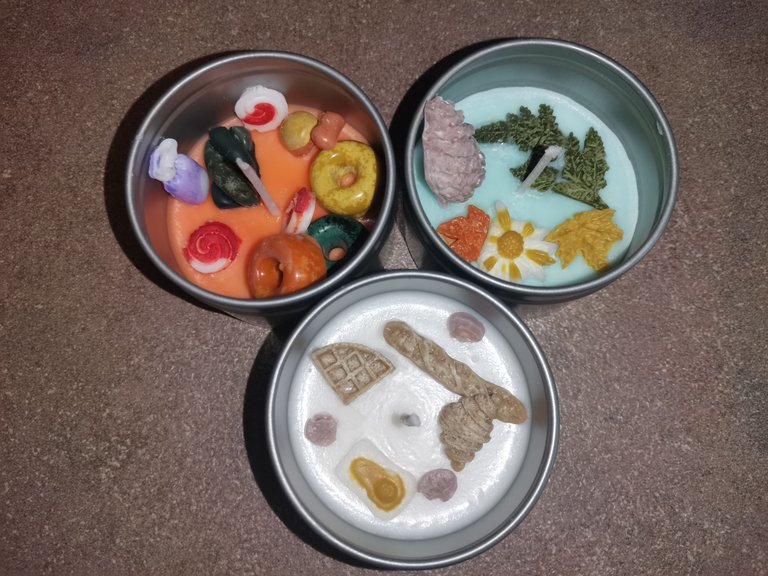
At first, I wanted to make 4x new candles where they would represent the followings:
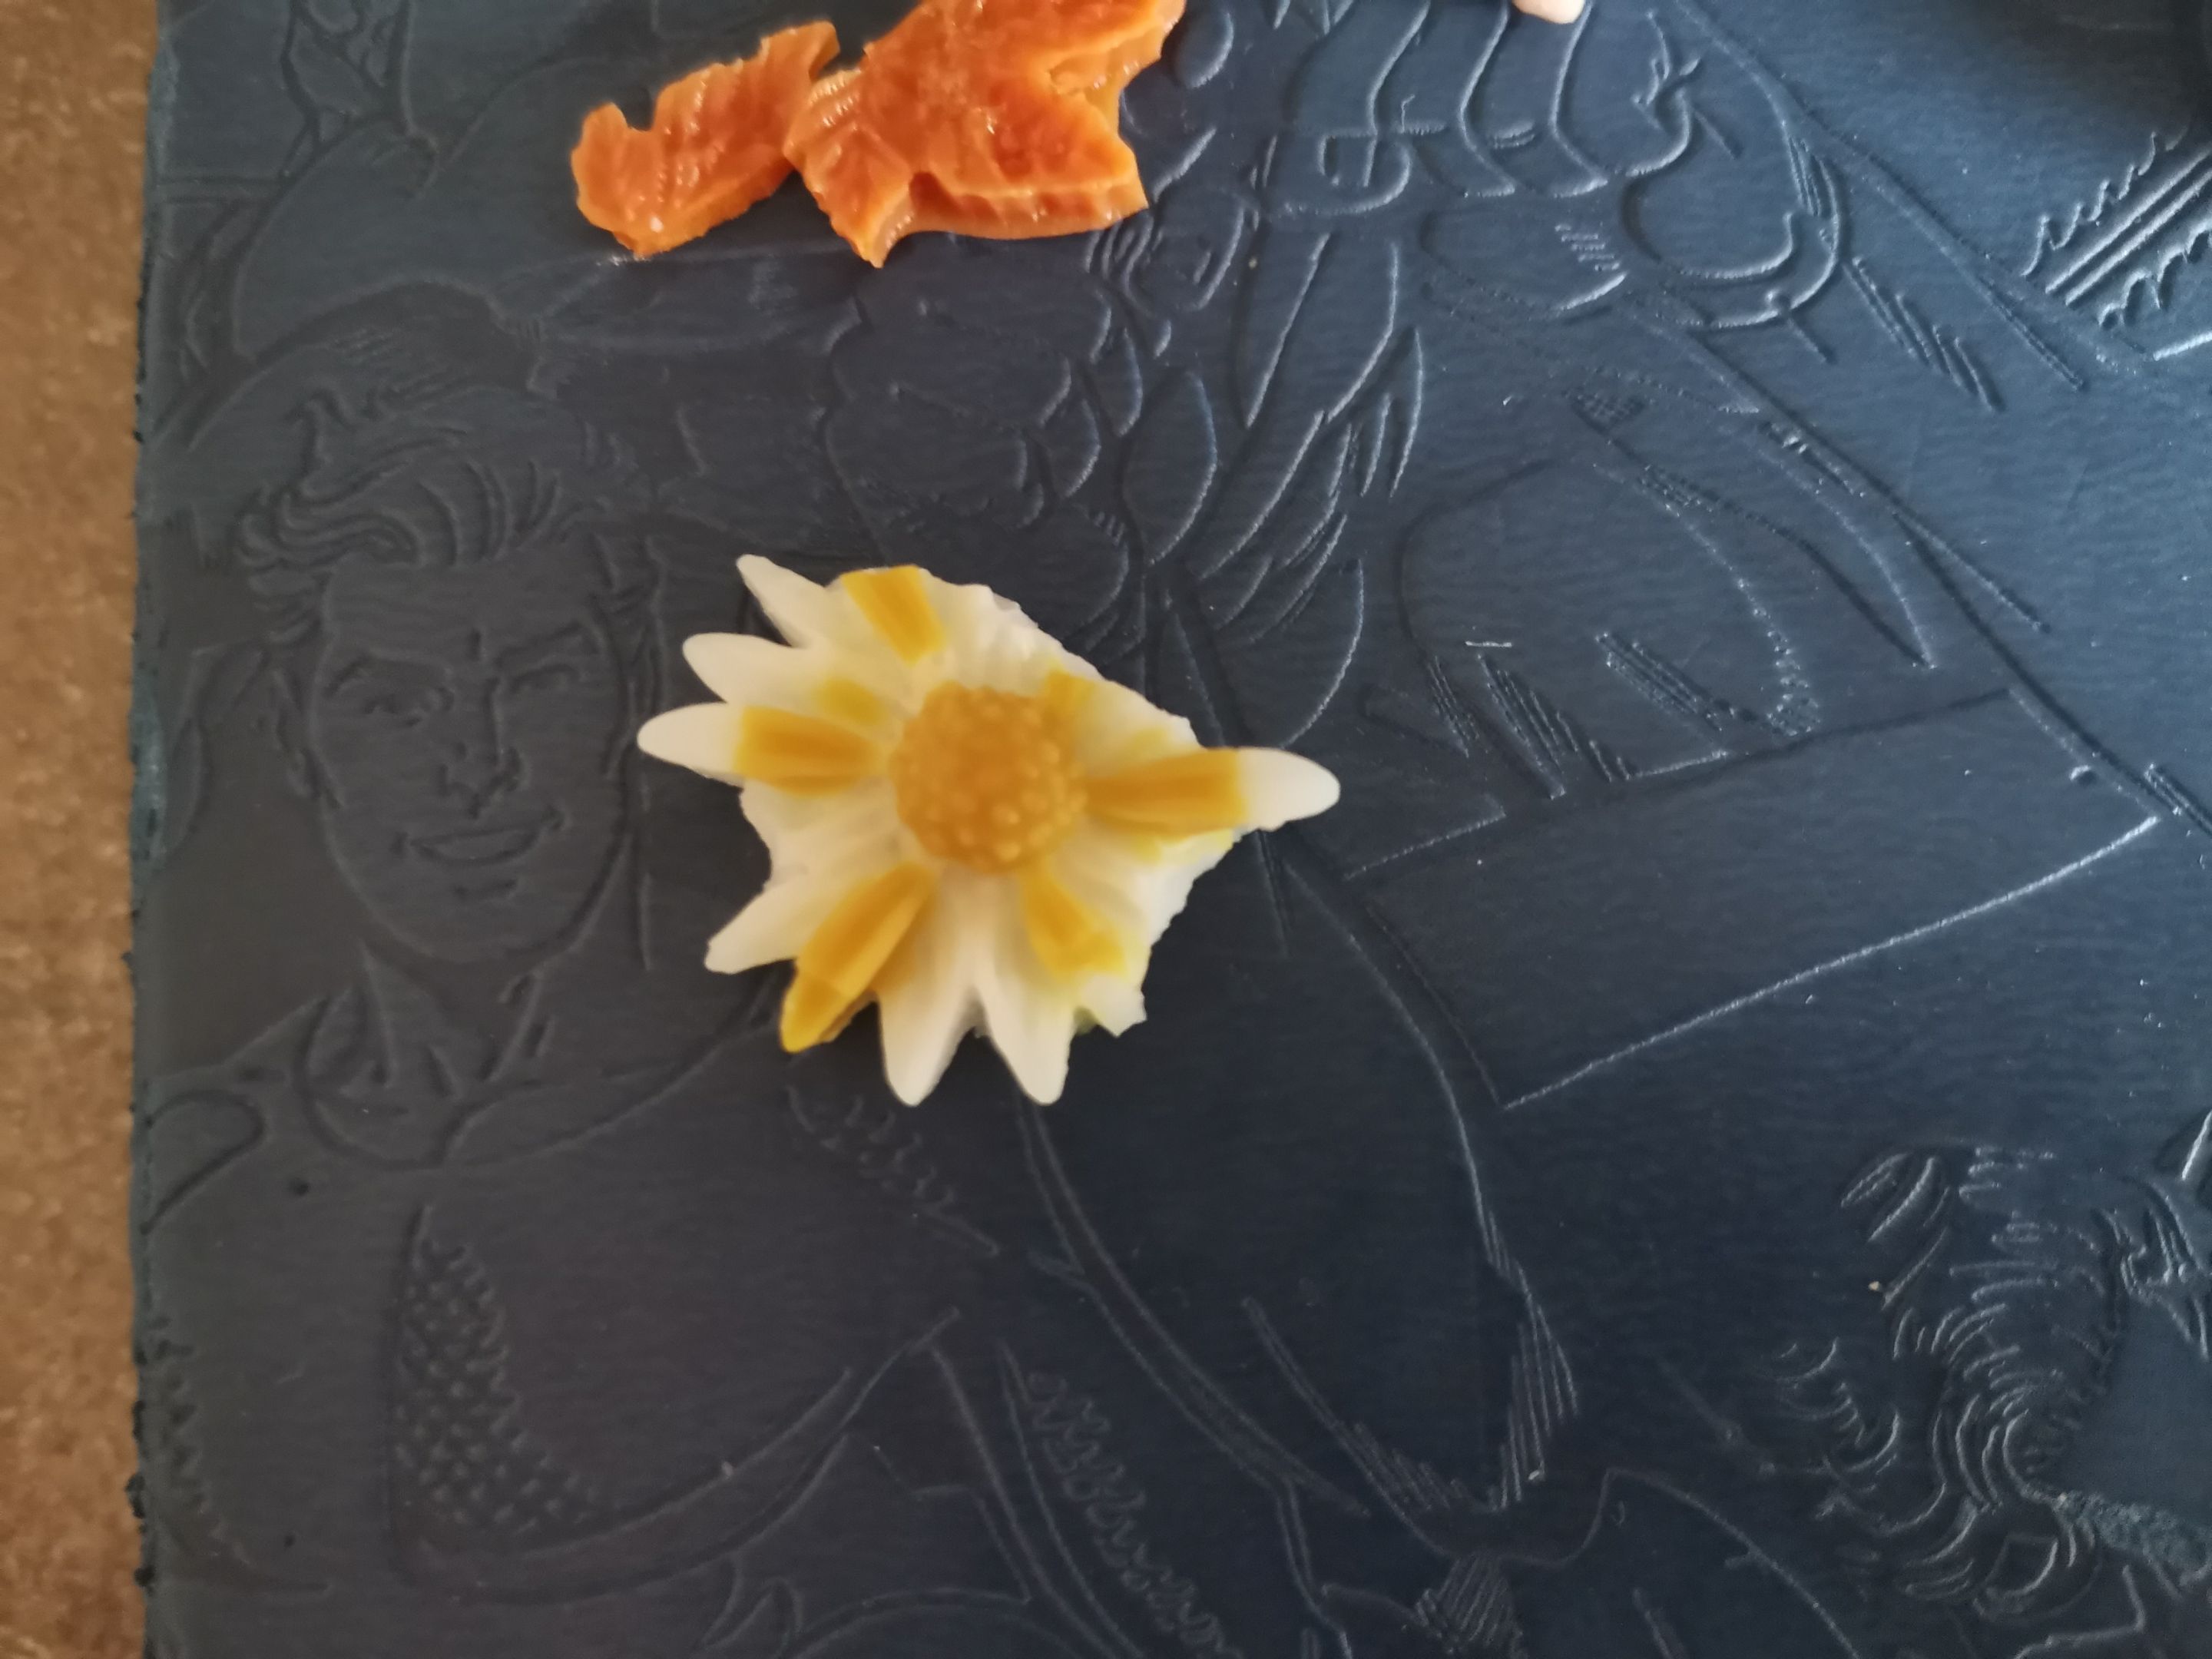
- Autumn Vibes: pine cones, red-orange-yellow falling leaves
- Nature: green leaves and lots of flowers
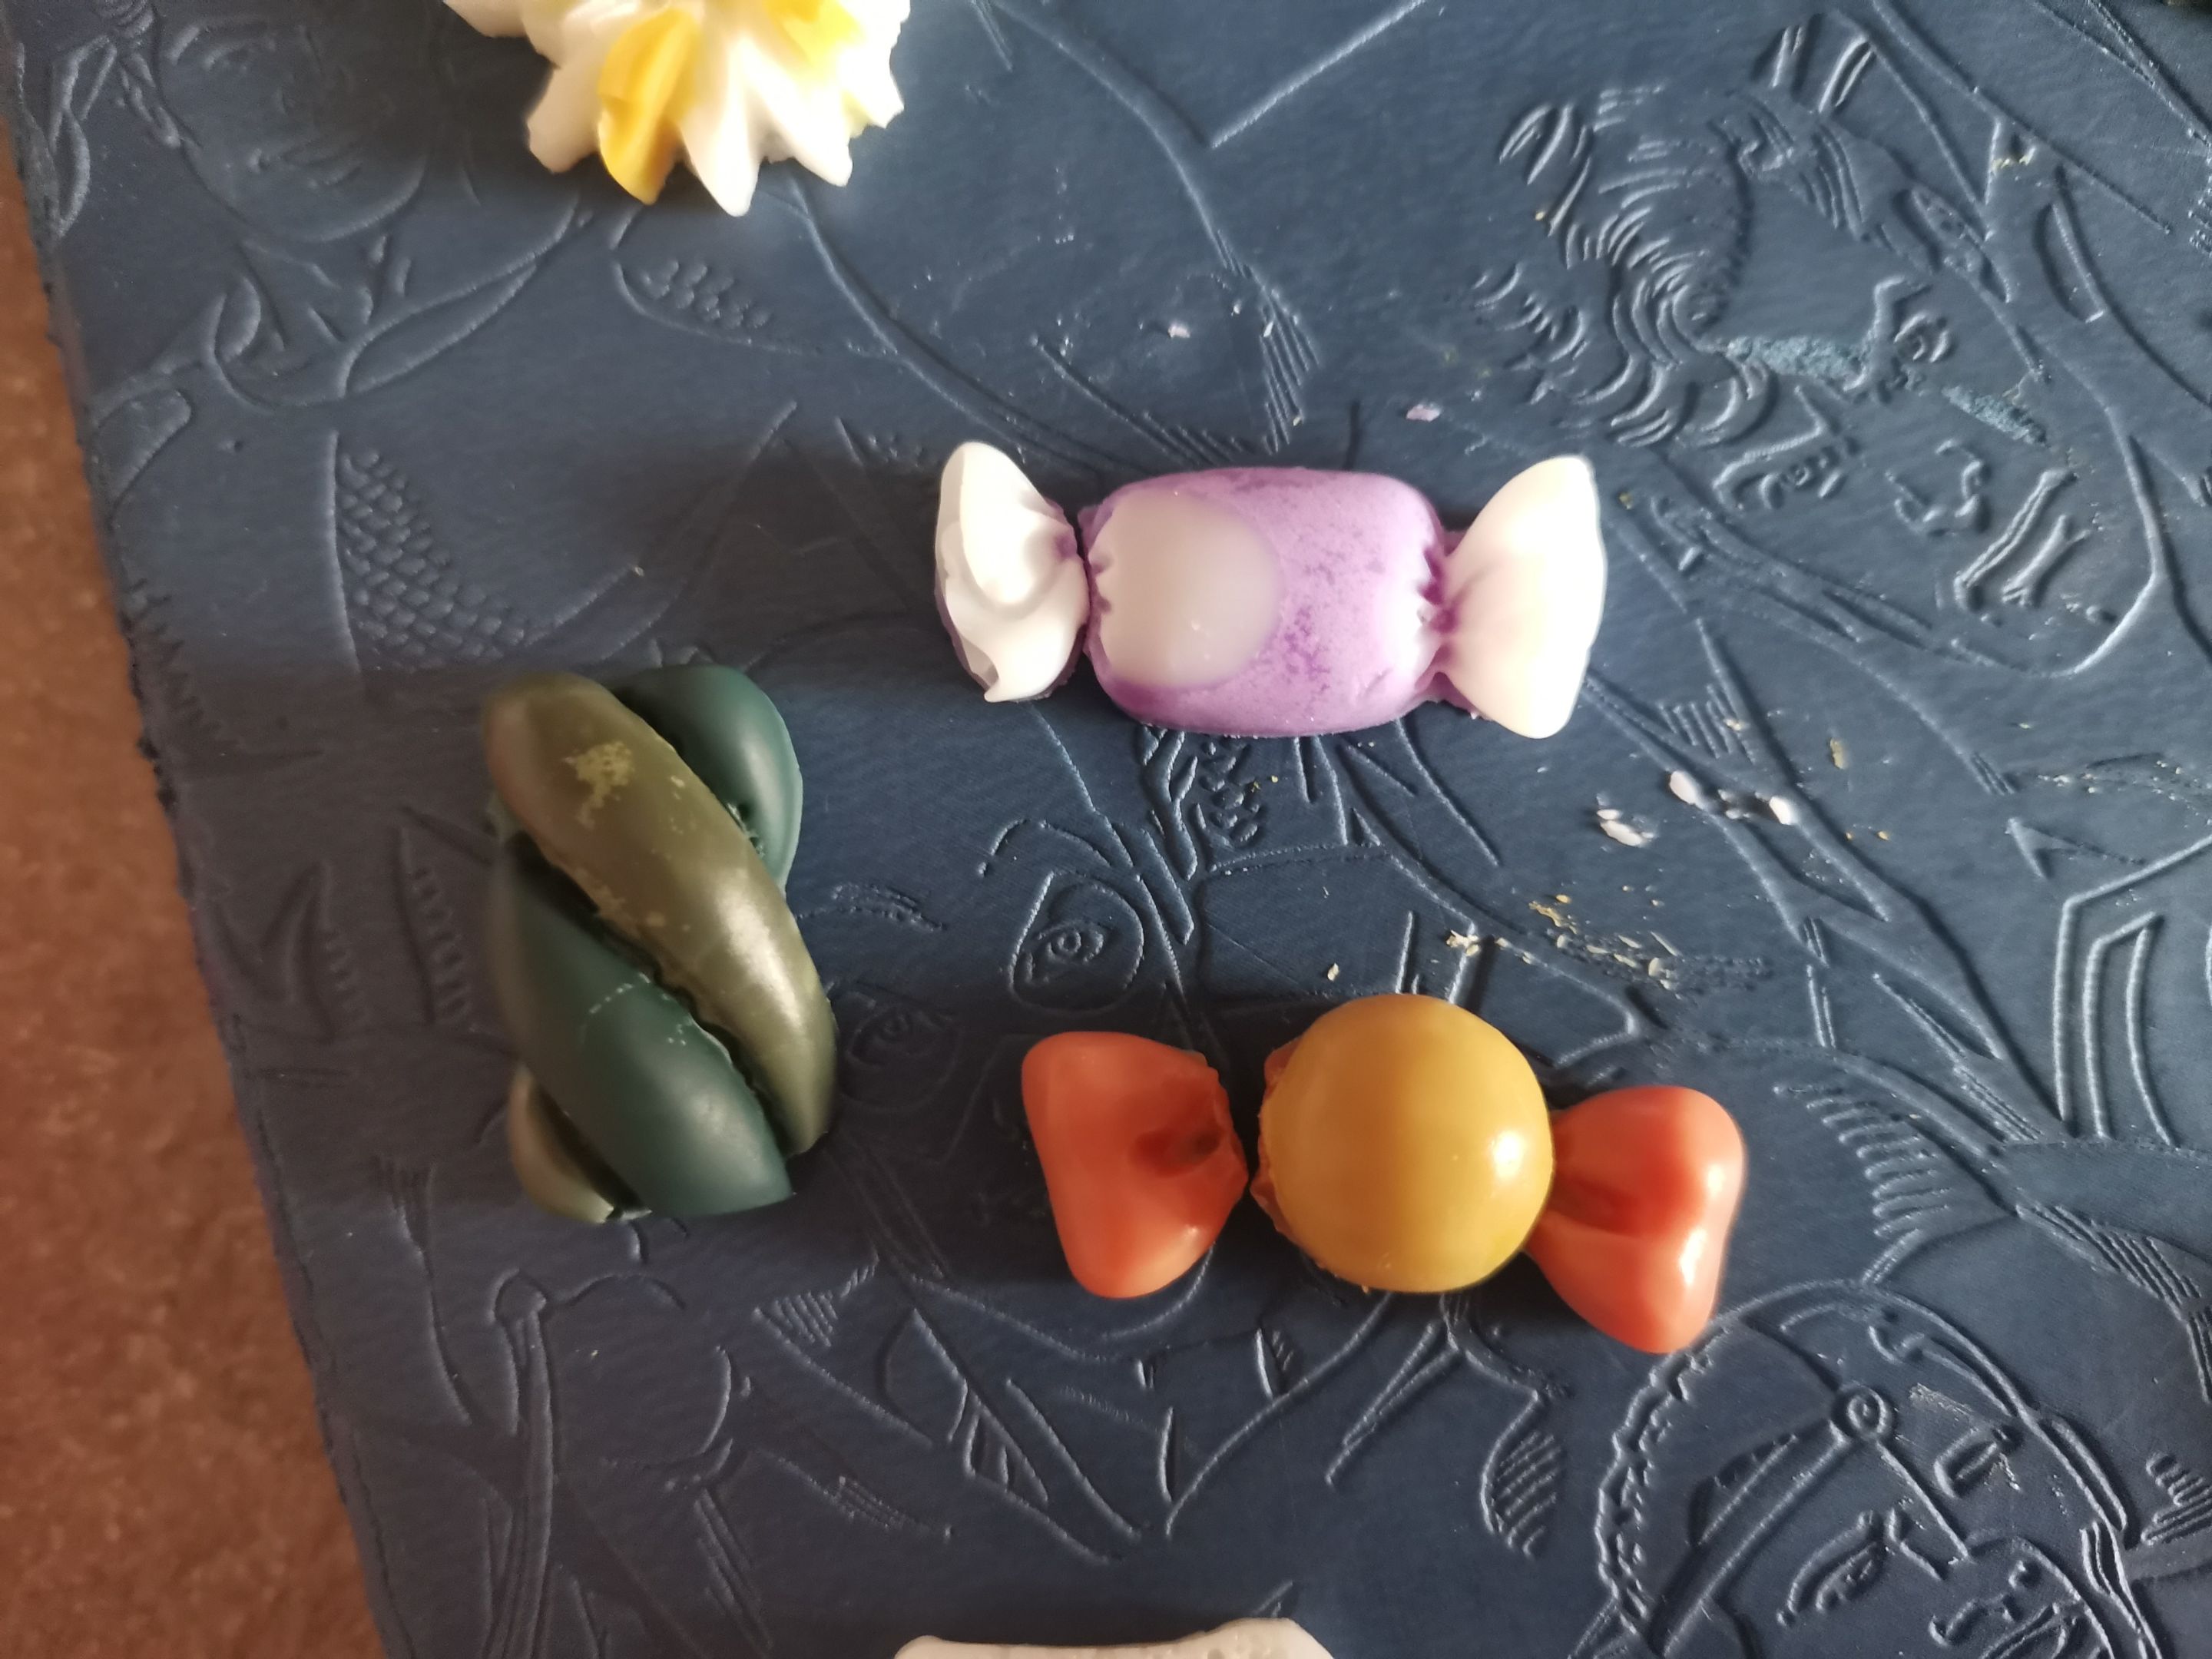
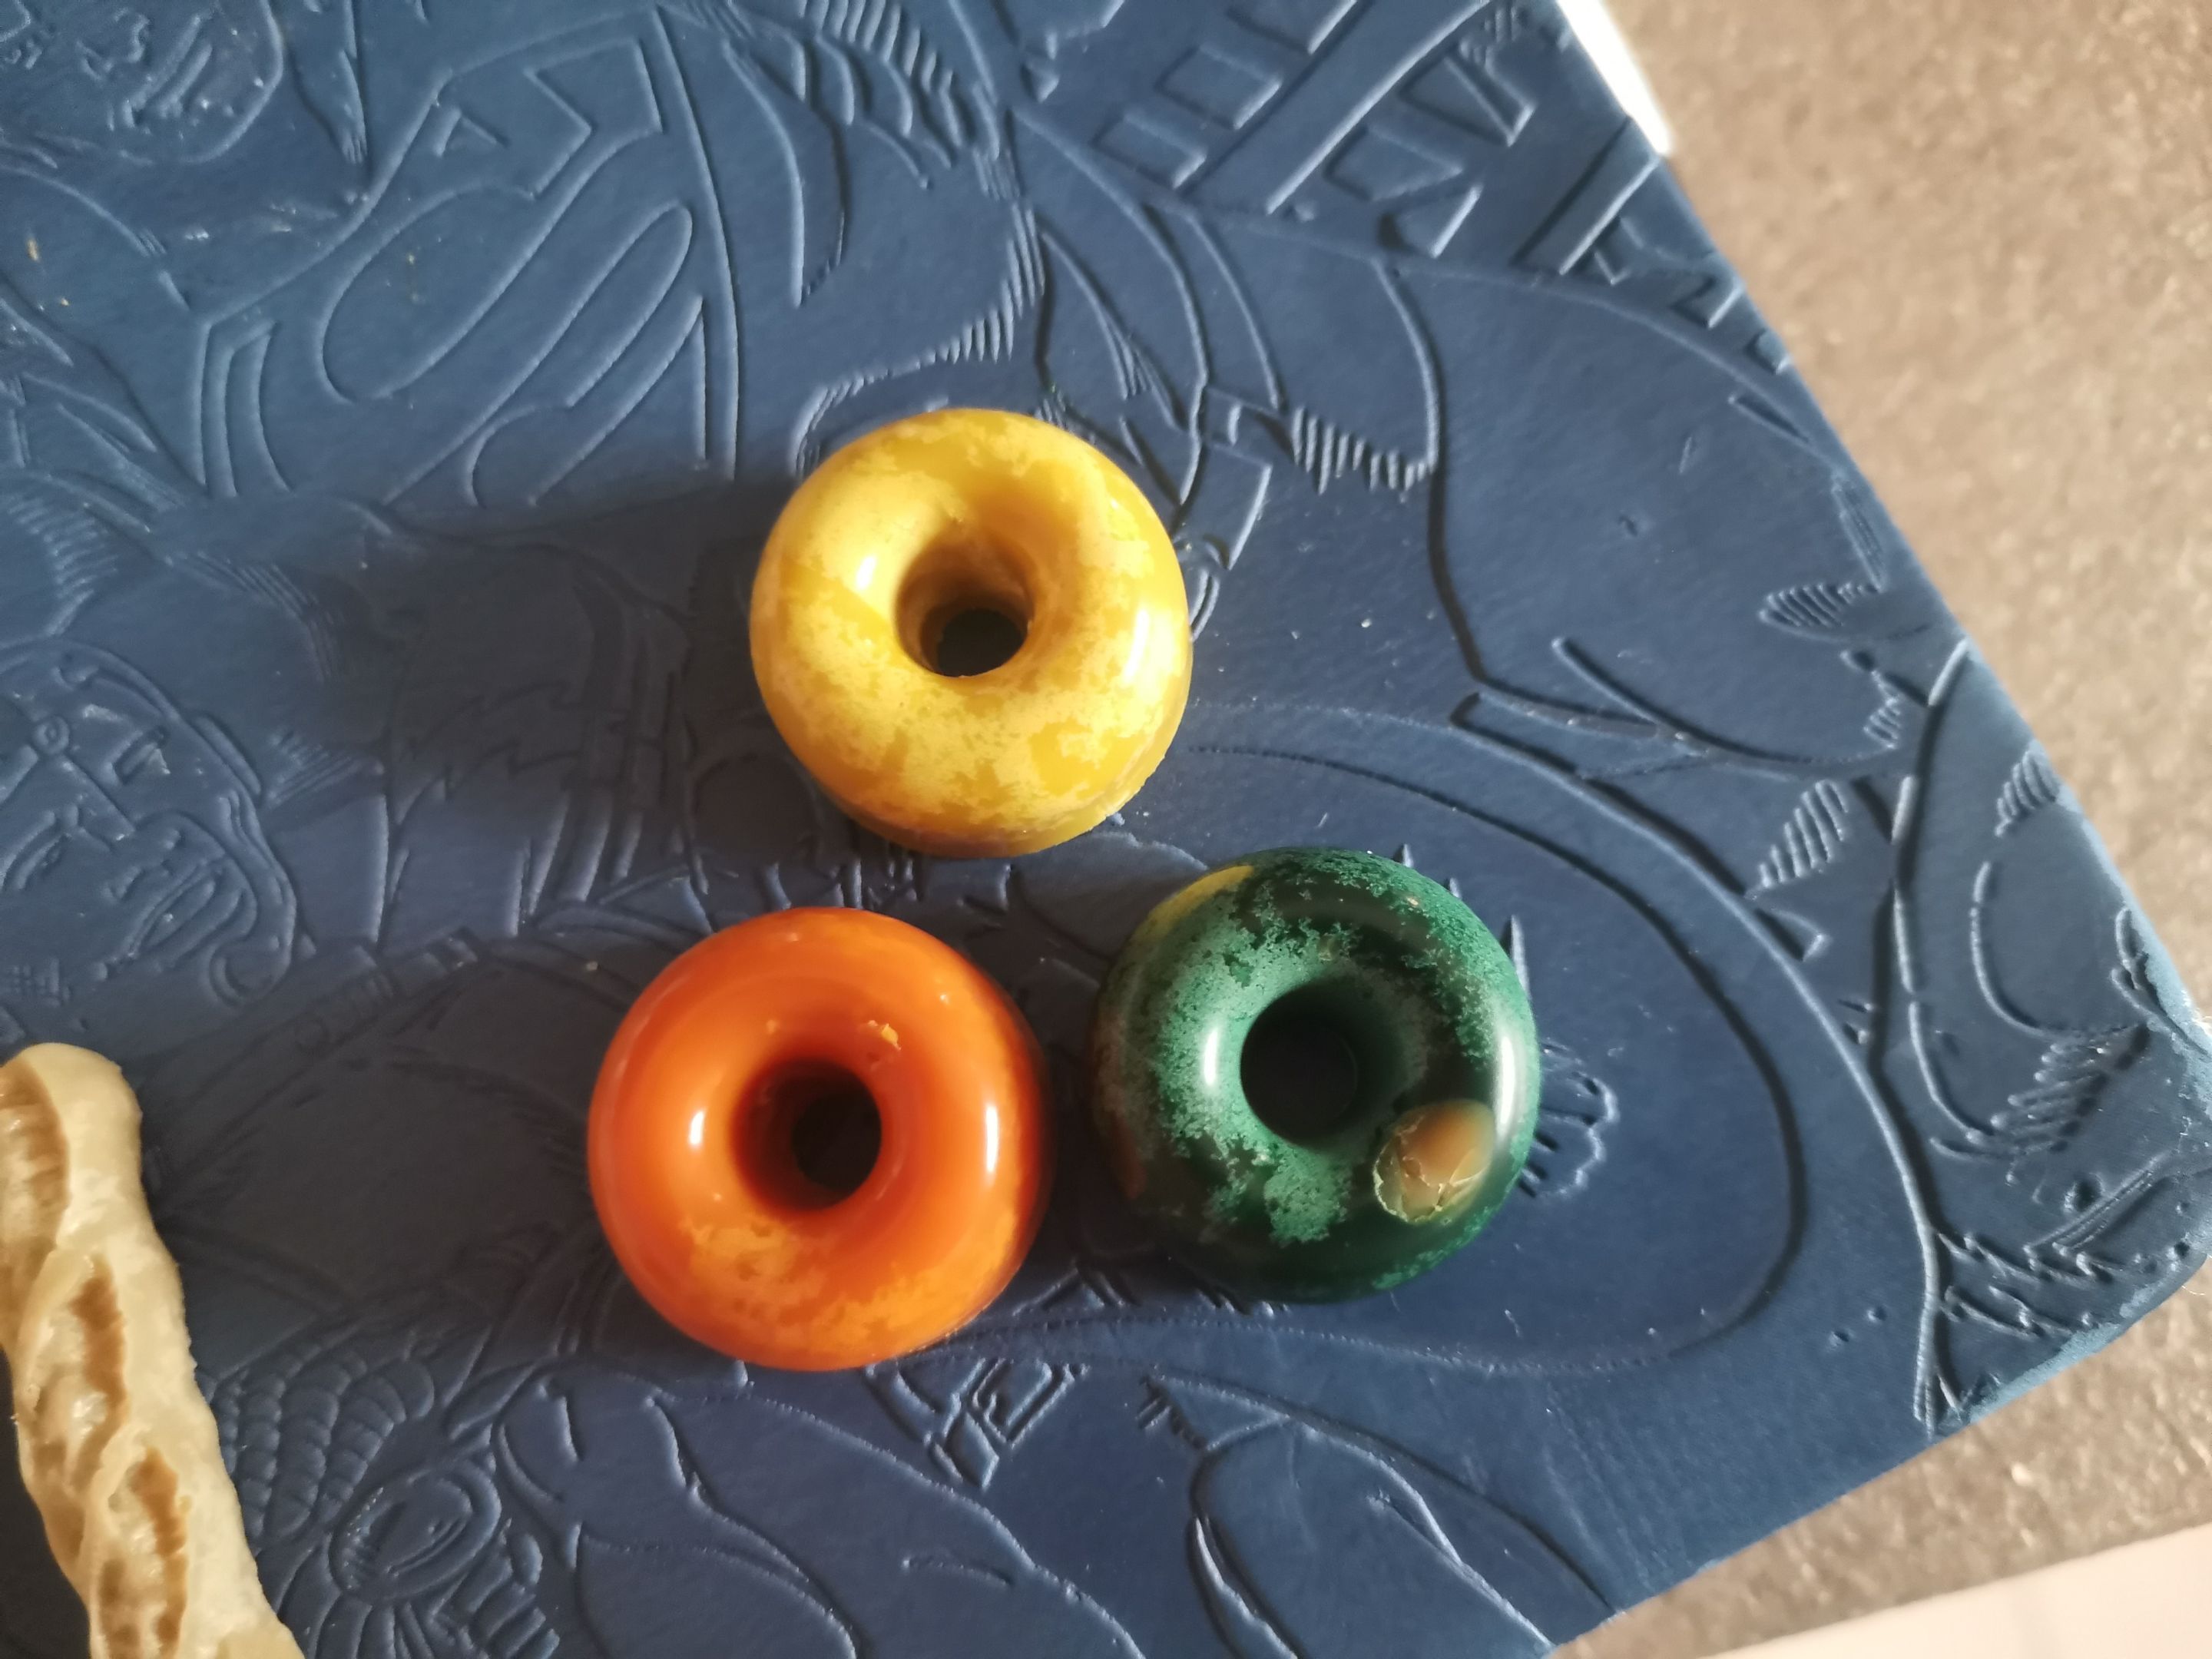
- Candy Wonderland: donuts, lollipops, candies
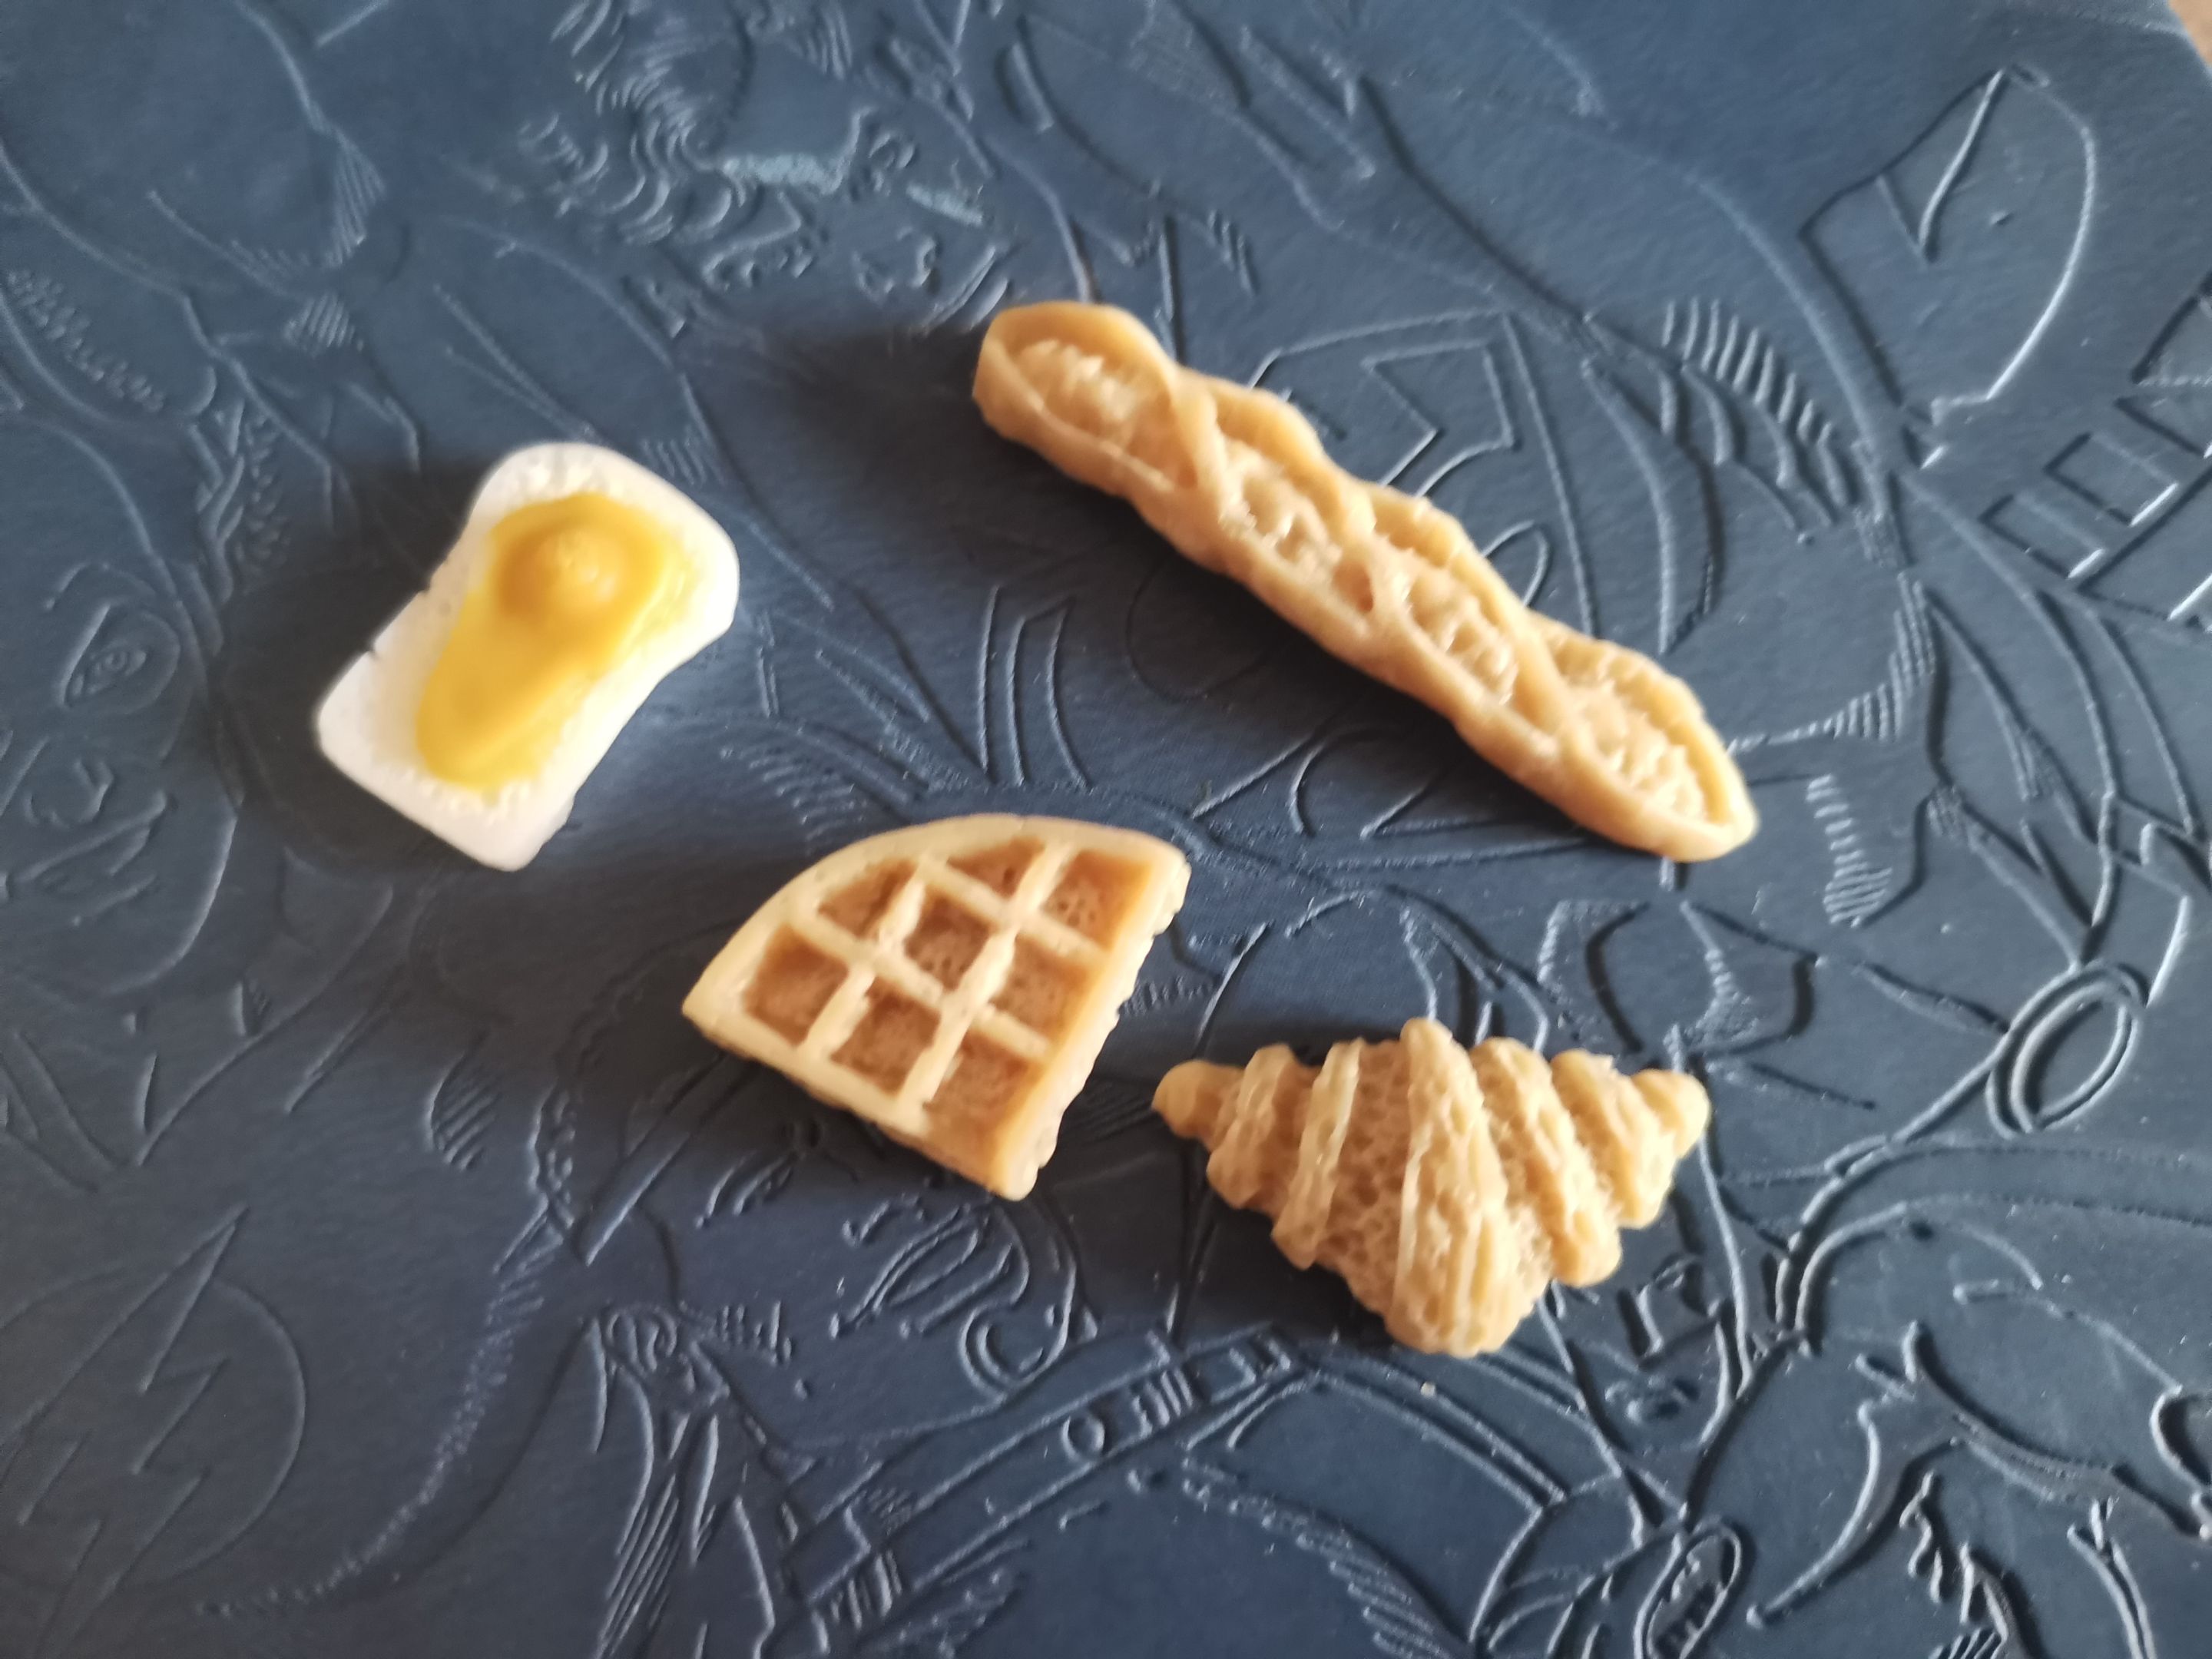
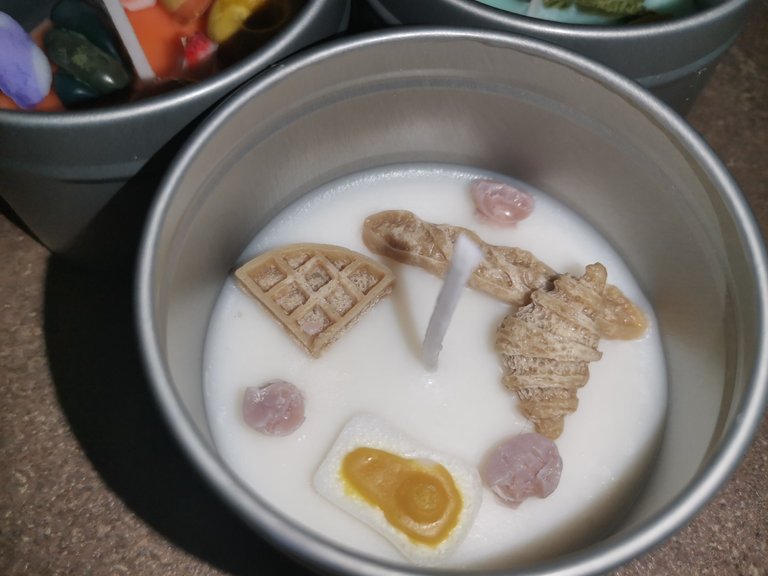
- Breakfast Essentials: bread, fried egg, coffee, waffles, croissants
Sadly, even if I constantly wrote down in my notebook all the processes and plans for further candles, it turned out I won't have enough wax to use for all four candles, so I decided to mix the first two: Autumn Vibes and Nature. In fact, they both represented nature but in different seasons.
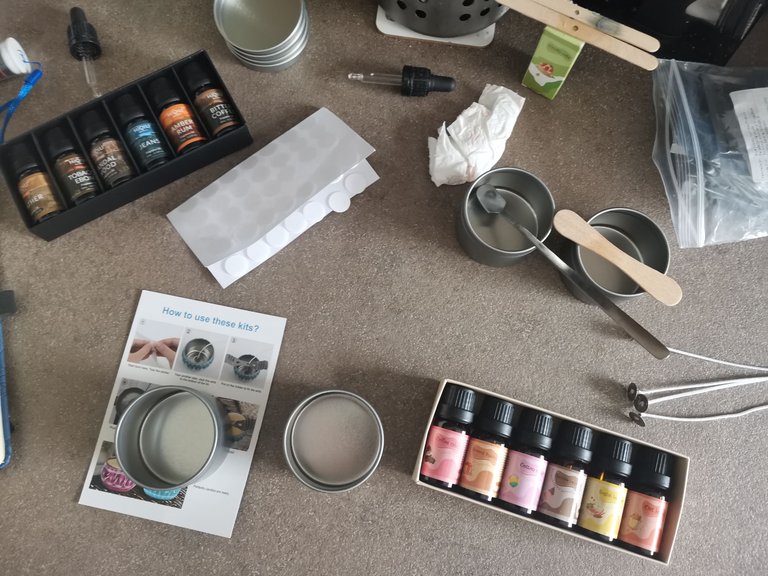
For the Nature candle, I used a pale green dye and Sandal Wood + Blossom Cherry scents.
For the Candy Wonderland candle, I used orange dye and Salty Caramel + Cotton Candy scents.
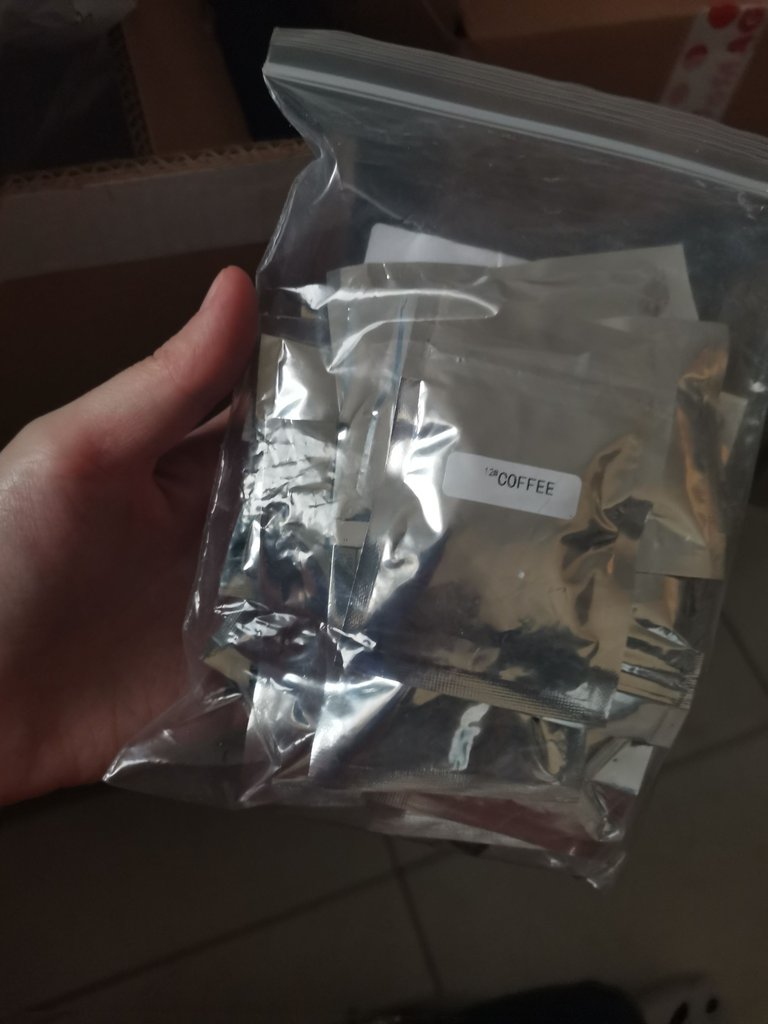
For the Breakfast Essentials candle, I used Coffee and English Breakfast scents.
Sadly, what I was most excited about thinking that the essential oil with the English Breakfast would smell as it was presented on the label, namely, fried eggs, sausage, fresh bread and pastry, it turned out into a big fail as the smell had nothing to do to any of the mentioned above.
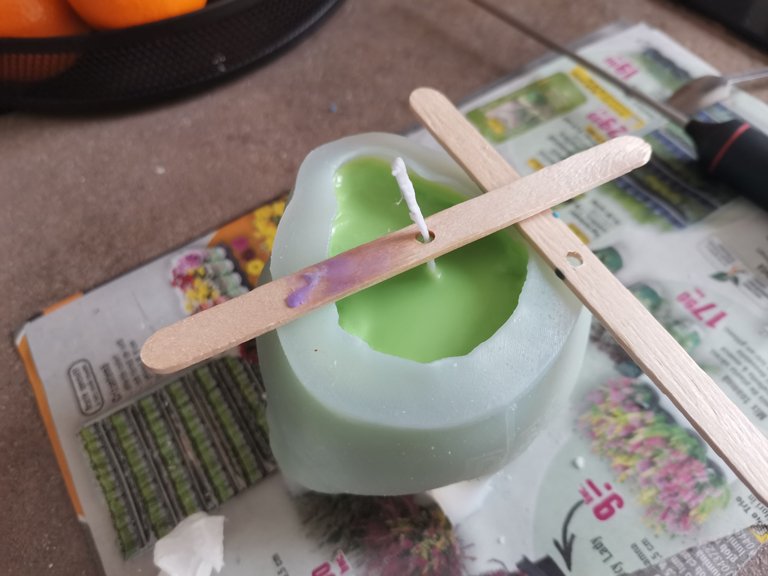
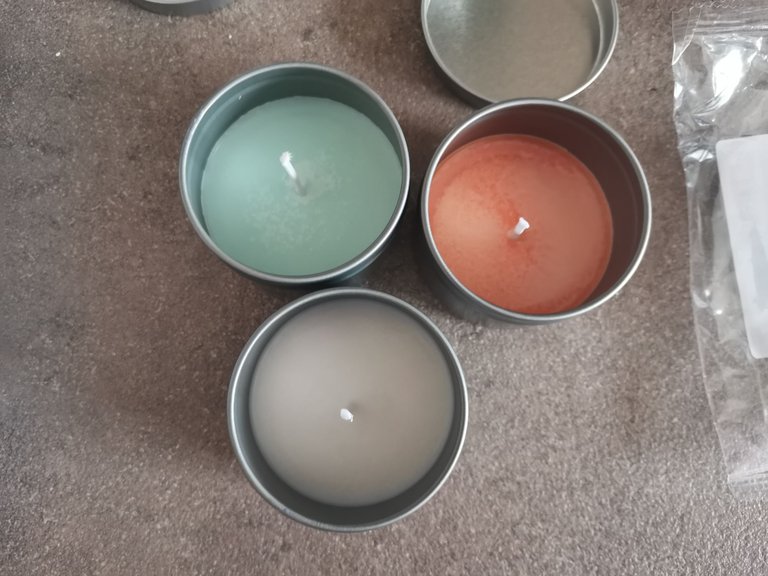
Also, even if it's already summer and I had around 24 Celsius Degrees in the kitchen at the moment of crafting these, the candles still created frosty crystals on top, but I had no problems with this as I was going to slightly melt the top again when placing the rest of the small candles so they stick and resist with the passage of time.
Now, on to the 'fun' part! Which turned out into no less than 4 hours of melting wax and pouring it in tiny forms, many of them requesting the same process be done twice, since I wanted some of the elements to have at least two colours.
Usually, this could be a very fun part indeed, but having just one pot that I can use for the wax and also a very limited amount of wax to melt, everything had to be used extremely carefully and take advantage of all the remains.
Such as, if, for example, you begin with the elements that need a yellow color but then you have some melted wax left in the pot, you can bring it again to the melting point then add some orange shards and play around until you get a new color to use for other elements as well.
Ideally, it's to use a lot more wax and create many more elements that you need so you will have spares in case some of them break.
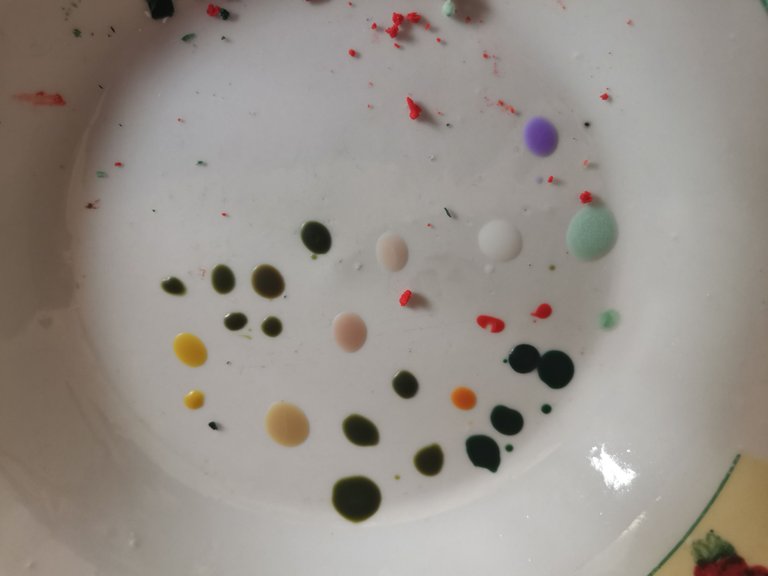
However, while mixing two colours is quite easy, starting with the 3rd colour or even the fourth, you will need to include whether white or black to adjust the colours before applying a new dye, otherwise the new colours won't be powerful enough to dominate the mix of colours mixed so far.
For this, I used a plate where I was adding drops of melted wax to make sure I would have the colour desired when the wax hardened in the molds.
So, 10 different shades of colours later and 4 hours of doing the same process all over again, the time for a little break of 2 hours came, yet the amount of time usually recommended for small elements to be used on the candles.
 |  |
|---|
 |  |
|---|
 |  |
|---|
 |  |
|---|
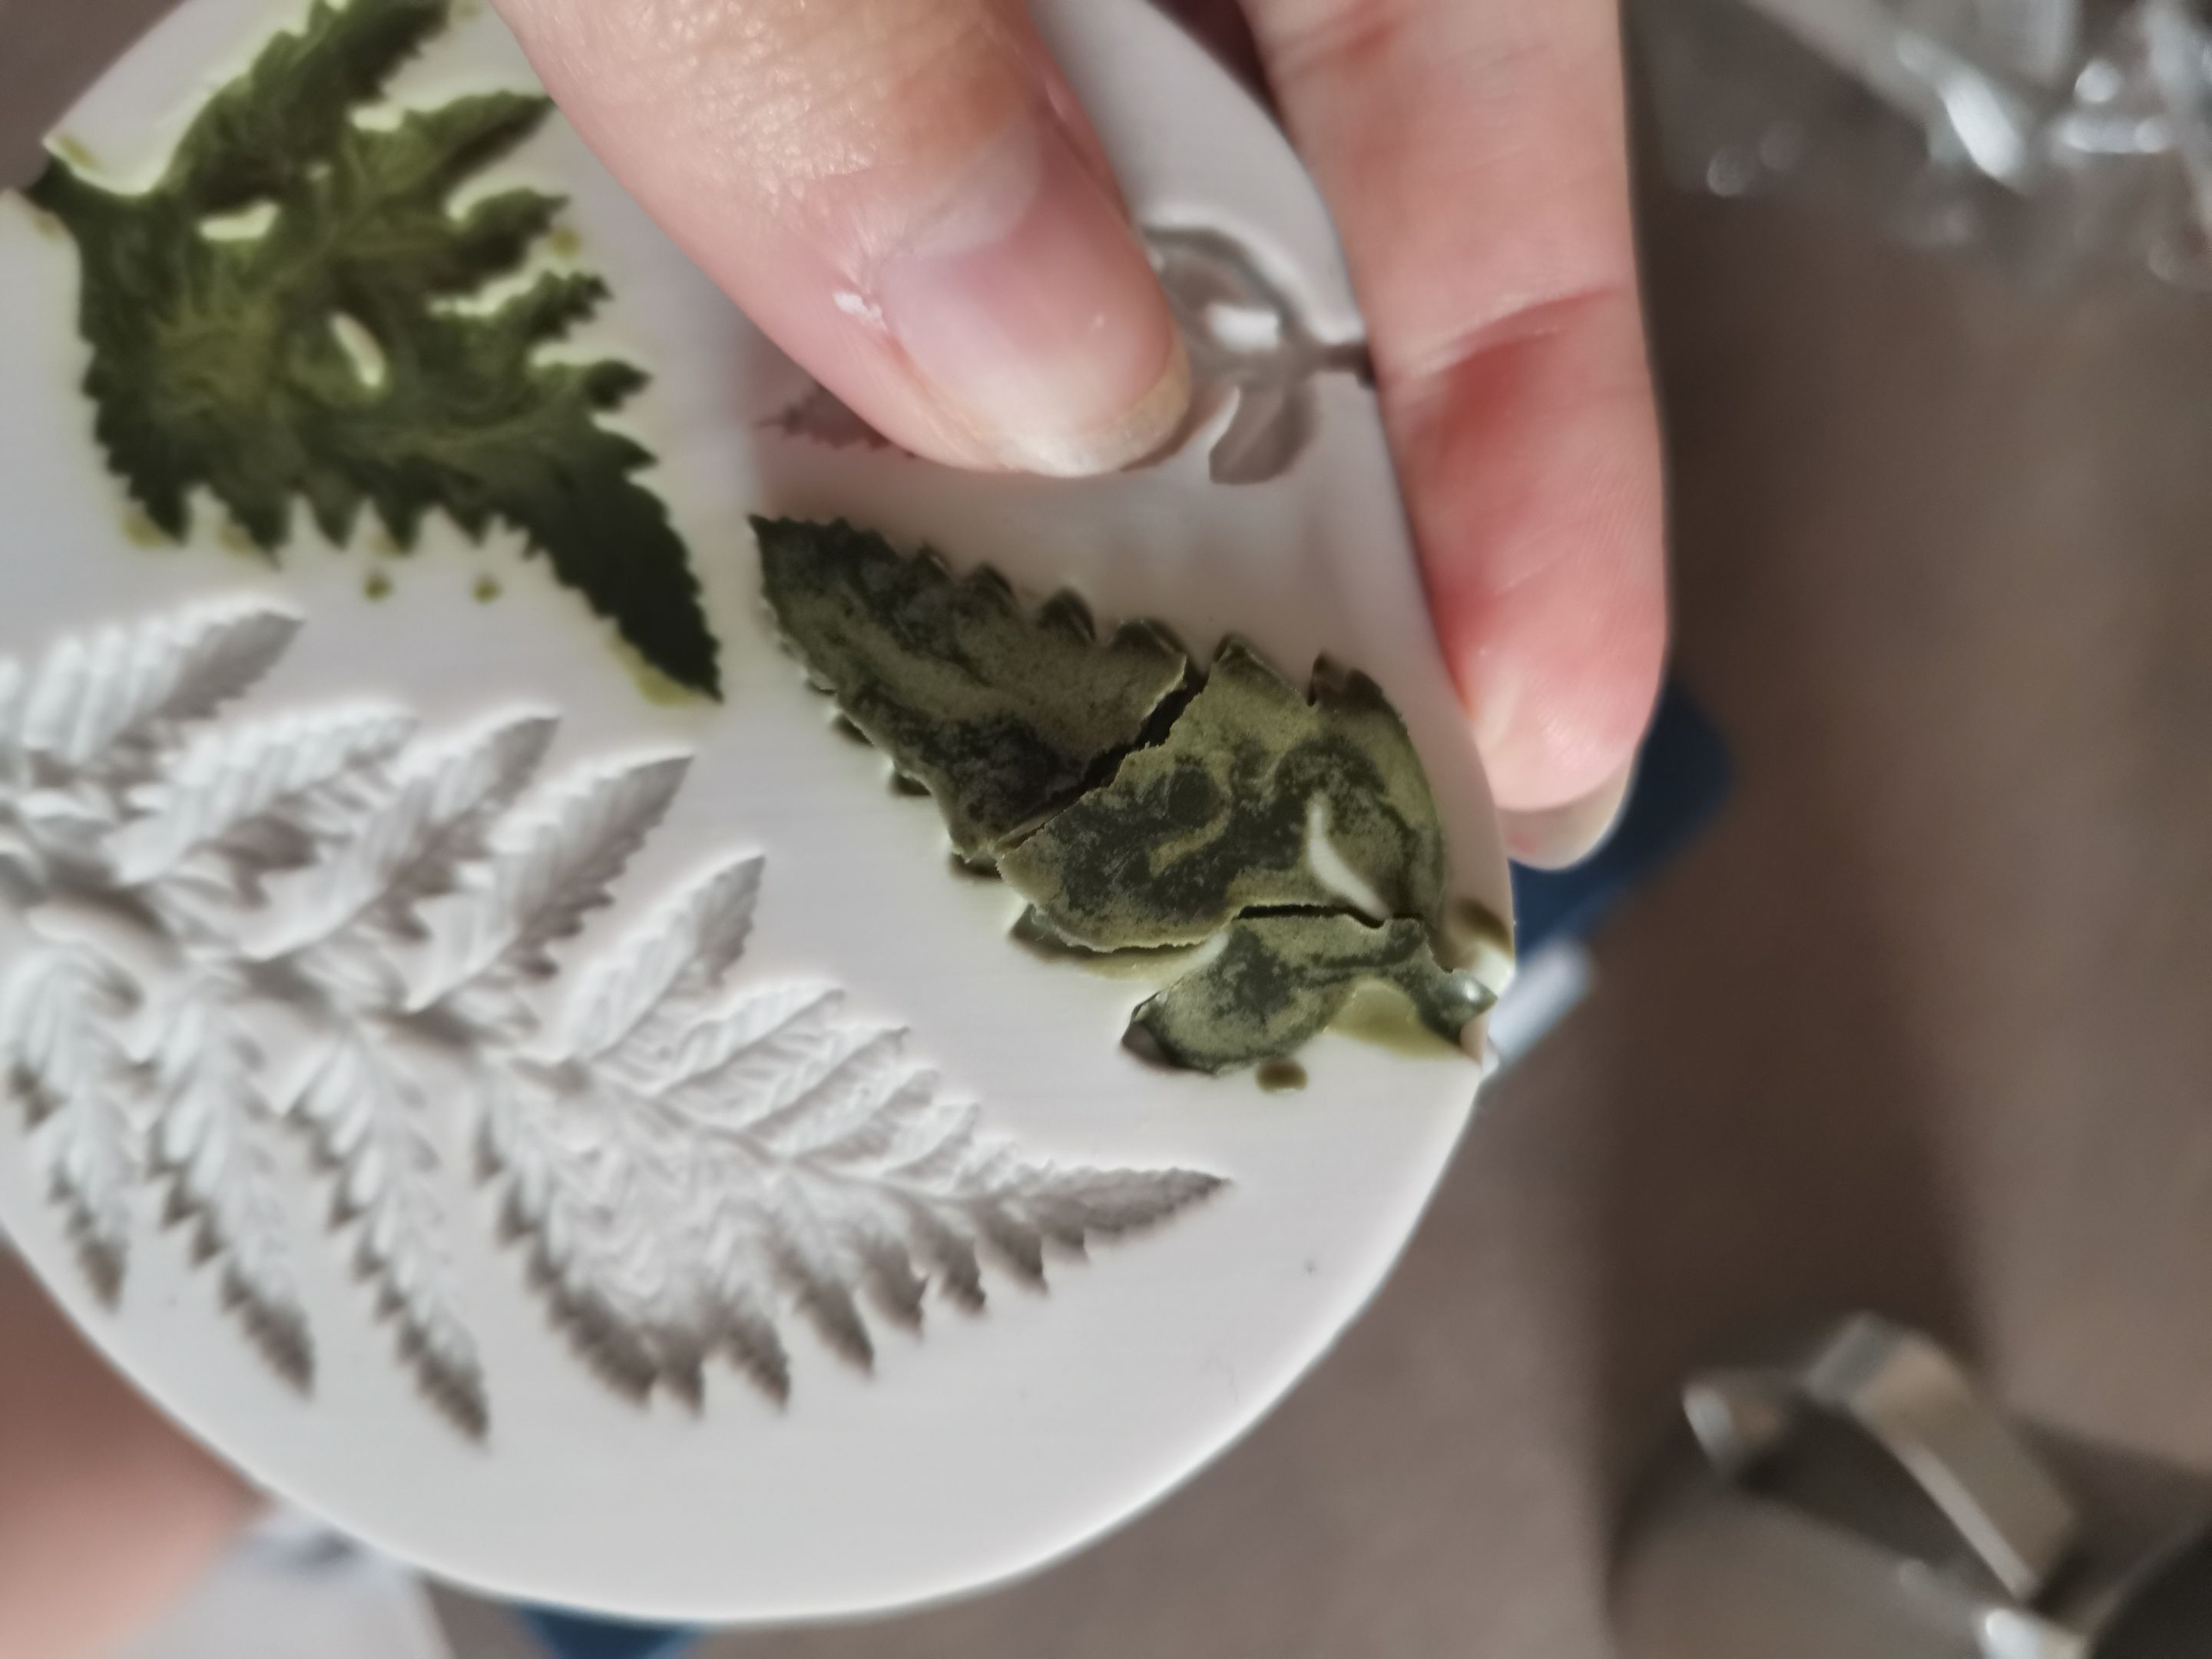
Sadly, as you could already see in the pictures from above, many of the elements turned into a fail having parts of them break when being taken out of the molds, which I can't really figure out why because the molds were heated before being used and I also used a pipette to make sure the whole surface would be filled.
I could see this coming on some of the molds, such as the one with leaves and flowers, as they were really thin and also included a lot more elements than each of the other designs, but sadly, the situation was repeated on more candle decorations.
A problem I'm convinced about is with the coffee mold, which wasn't created well from the start since the coffee beans did not break but still didn't seem like beans when being taken out.
The single ones that turned out amazing, in my opinion, are the donuts and breakfast elements, which I absolutely love!


Anyway, as I mentioned before, I crafted these candles from pure passion and curiosity, and I have no intention to take everything to the next level, so I don't mind their final look which is quite different from what I expected. However, I'm still proud of myself even if they didn't turn out perfectly.
In fact, it's often the process and the journey that turn out more exciting than the results, and I can fully agree to that, even though each of them smells incredibly well and I can't wait to light them up and let my tiny room get blessed with these scents.
Down below, I will leave the temperatures and quantities I used to create these. Feel free to use them on your crafts or even suggest adjustments if you are using different techniques. ❤️
Measuring how much wax you need:
Fill the mold or jar with water, but leave a bit of space on top of it, as the dye and essential oils you will use will raise the volume as well.
Weight how much water you used and multiply it with 0,86 to obtain the quantity of wax you need to melt.
Example: 295ml of water x 0,86 = 8,6 oz / 246 g of wax
Melting the wax:
Add a pot of water and let it boil, then place on top of it the pot for wax and melt it following the bain marie method.
Stir constantly the wax until it is fully melted and let it stand still until around 80 Celsius Degrees.
Adding the essential oils:
At 85 Celsius Degrees add the essential oil(s) you want.
The quantity of essential oil(s) should be between 6-10% of the total weight of the candle.
Example: 100g of wax x 10% = 10g oil OR 100g of wax x 6% = 6g oil
Many people tend to think that if they add as much essential oil as possible, it will make the candle have a powerful scent, but in fact, the power of a scent is given by how well the method is applied, as well as the quality of the essential oils themselves. Adding more essential oil than needed will only result in a defective wax that won't keep up with dissolving the whole oil, and obviously it will break, have water bubbles, smell weird or even make it unable to be burnt anymore.
Adding the dyes:
- Add the dyes anytime between 82-88 Celsius Degrees, but pay attention to the type of dye used (shards, liquid, powder, etc).
Example: 2 drops of liquid dye / 0,9g of wax OR 1-3 shards of dye depending on how powerful the colors you want to be.
There is no math formula in this case, as the quantity of dye used can only adjust the final colour without causing any problems.
- There are people who add the dye before adding the essential oil, and there is no problem with that, but depending on the essential oils used, they could slightly modify the color of the wax and that's why is recommended to add these first.
Pouring the melted wax in shapes
Depending on the type of wax used, you will need to pour this at different temperatures as follows:
- 38 Celsius Degrees for Paraffin Wax;
- 53 Celsius Degrees for Soy Wax;
- 63 Celsius Degrees for BeesWax.
I only worked with Soy and BeesWax, as from what I understood, the Paraffin one is very dangerous if you have pets, but these are the temperatures I used on my end.
Getting ready the mold/jar:
Whether you are using a jar or a silicone mold, it's recommended to use a heat gun in both cases so that the temperature differences are as little as possible when the shape meets the melted wax.
For the jars, you can add the candle wick a lot easier, placing it on a round adhesive and then sticking it in the middle of the shape, but for the silicone mold you will need to have a special tool that can help you hook the wick and get it through the middle of the mold. No adhesive is needed in this case.
Make sure to pour the melted wax as slowly as possible and from a small distance to avoid having air bubbles formed inside the candle.
Waiting time before taking the candle out:
Just as in the case of when you can pour the melted wax, the same applies when you can take it out, based on the material in which it was poured.
For the metal or glass shapes, it's recommended to wait between 2-4 hours.
For the silicone molds it's recommended to wait between 1-4 hours, depending on the size of the mold.
From my honest experience trying all kinds of methods to create my candles, I can say that none of the candles were ready before two hours, not even the tiniest ones.
For the cat candles, I was leaving these rest somewhere between 4-6 hours or even during the night, and they had no problem when being taken out of the molds. The single problems encountered were with the aspect which included either the frosty effect or air bubbles.
Again, this is just a guide with what I used on my end, but I'd be more than happy to read different methods and temperatures used and try on my end to see which works best.

Gabriela Travels is the FOUNDER of "Festival Mania" who started this community from the passion of attending various festivals and with the purpose of encouraging more people to explore festivals all around the world and share their experiences.
At the same time, Gabriela is an independent Graphic Design Freelancer since 2019 completing over 600+ orders in this time and collaborating with various businesses and people from all over the globe.
Additionally, Gabriela has her own corner on the internet since 2017 where she writes various articles for her blog, the most popular being the travel ones (300+ articles written on this field), but also approaching other topics as well, like game reviews, lets plays, movie and series reviews, photography posts, cooking recipes and more, boosting the total number of articles written to 750+ blog posts.
Gabriela is also a gamer since she was 11 years old and gaming remains one of her biggest passions along with traveling, owning a YouTube channel for each of the two.
Congratulations @gabrielatravels! You have completed the following achievement on the Hive blockchain And have been rewarded with New badge(s)
Your next payout target is 40000 HP.
The unit is Hive Power equivalent because post and comment rewards can be split into HP and HBD
You can view your badges on your board and compare yourself to others in the Ranking
If you no longer want to receive notifications, reply to this comment with the word
STOPWhat a nice Passion ❤️❤️❤️ and these candles looks ....well I don't know why but looks yummy 🤣🤣
They smell yummy too! 🤤🤤
Those look pretty cool! And if you ever decide to take the hobby to the next level, all the experience in doing things just for fun will be invaluable. Cheers!
Absolutely. Thank you so much for the encouraging words 🥰
My pleasure! 😉
Que bien trabajo, aunque un poco laborioso Pero el resultado valió la pena, te felicito.
Thanks!
Wow, it looks so cool, especially the cat! But seems like it requires a lot of patience
It does! And it's quite time-consuming as well. Have to play around a lot until figuring out what works the best for you and the materials you are working with. But it was surely worth it :)
Wow. This is incredible, not only does it looks yummy I bet it smells great too. This could genuinely be a full on scalable business
Amazing 👏🏿
Thank you! I can agree with the smell. It's incredible!!
You should sell them
I'm sure they be perfect
Thank you!
Such a lovely new passion. Your homemade scented candles look appealing and calming. great job capturing both aesthetics and fragrance. 👏🏿
selected by @stevenson7
Thank you so much. It means so much to read this coming from you!
@Gabriela I really enjoyed your post. Very enlightening about candle making
I'll have to read it over and over again
Cheers 💕
Cheers from Romania!
Awwwwwwn 💞
Thanks for your vote 🙏
Above all, I would like to thank you for sharing your wonderful skills in making various types of candles with all of us.
A candle art always inspires us all with its wonderful color activation and wonderful art to illuminate the world.
Thank you for the kind words. I do hope that my post will be helpful for at least one person on here :)
Of course, I hope this post will be helpful to everyone, thank you.
Hello gabrielatravels!
It's nice to let you know that your article won 🥇 place.
Your post is among the best articles voted 7 days ago by the @hive-lu | King Lucoin Curator by keithtaylor
You and your curator receive 0.0002 Lu (Lucoin) investment token and a 9.54% share of the reward from Daily Report 695. Additionally, you can also receive a unique LUGOLD token for taking 1st place. All you need to do is reblog this report of the day with your winnings.
Buy Lu on the Hive-Engine exchange | World of Lu created by @szejq
STOPor to resume write a wordSTART