I made a sweet wrist bangle using elastic bands. Come, let me show you how.

Hello lovelies 🤗😘❤️❤️!!!
I have missed you people and my crafty skills for a while now here on blockchain. Nevertheless, it is not intentional rather, it was as a result of a holiday I went in a rural area where there is limited network availability including our physical family activities which is the preparation of my brother's wedding which is now a bygone.
Therefore, I am now back to blockchain!
I am back online with the creativity or creation of this beautiful and adorable wristband made with elastic bands. For sure, I don't really know the name of this particular elastic band, but all I know is that it is an elastic band lolz 😂 😂 😂.
You can find it inside some hair extensions (E.g kinky) or you can as well purchase it for the decoration and beautification of your kids hair.
Now, let me show you how to form this fancyful wrist band with this elastic band. First, you must get this below items ready.
Needed items:

- 1 5 Elastic bands
- 2: 16 size 7 beads
- 3: 1 needle
- 4: African thread
- 5: Scissors
- 6: Your hands 👏, eyes 👀 and brain 🧠🤗🤗😂😂
Preparation procedures
Stretch the elastic band, then, fold in two.


Fix a thread in the needle and then use it to hold the two ends of the elastic band together by crossing the needle in-between the two ends. (Please note that while stitching the ends together with the needle, you must remain a small part of the thread tip for easy tying of knot at the end.)
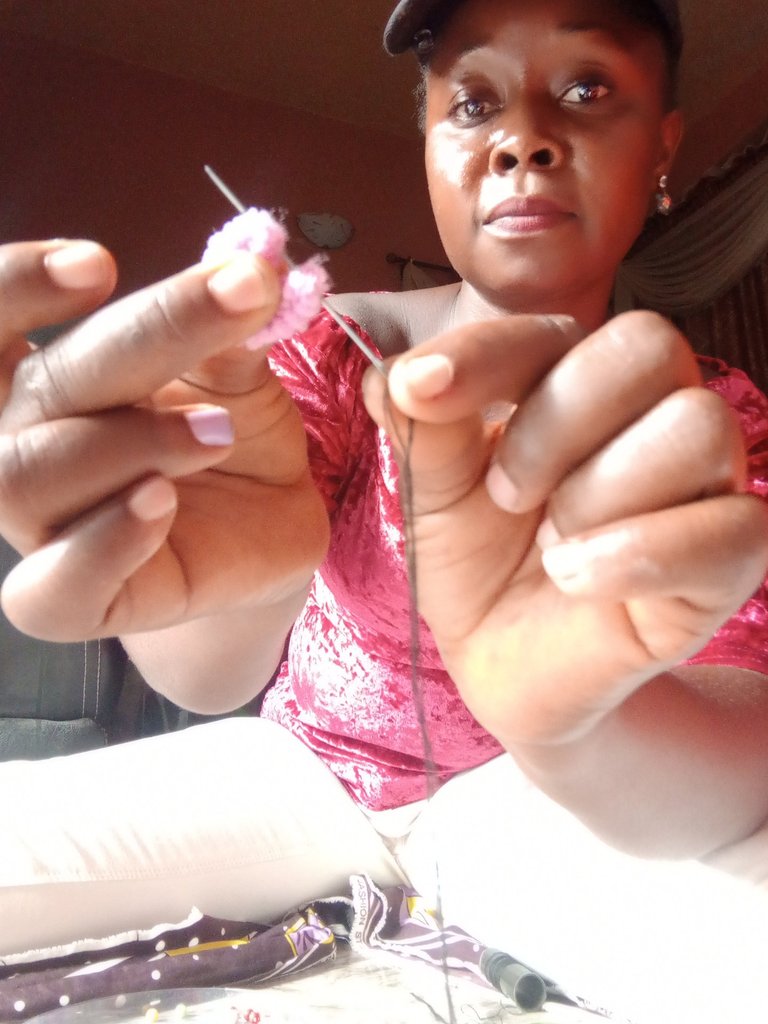
I continued the whole process circularly until I succeeded in joining the four ends together. Then, I tied a knot. Look at how beautiful it has become although this is not the final stage 😔 (remember that one band is a remnant. We will use it at the end)

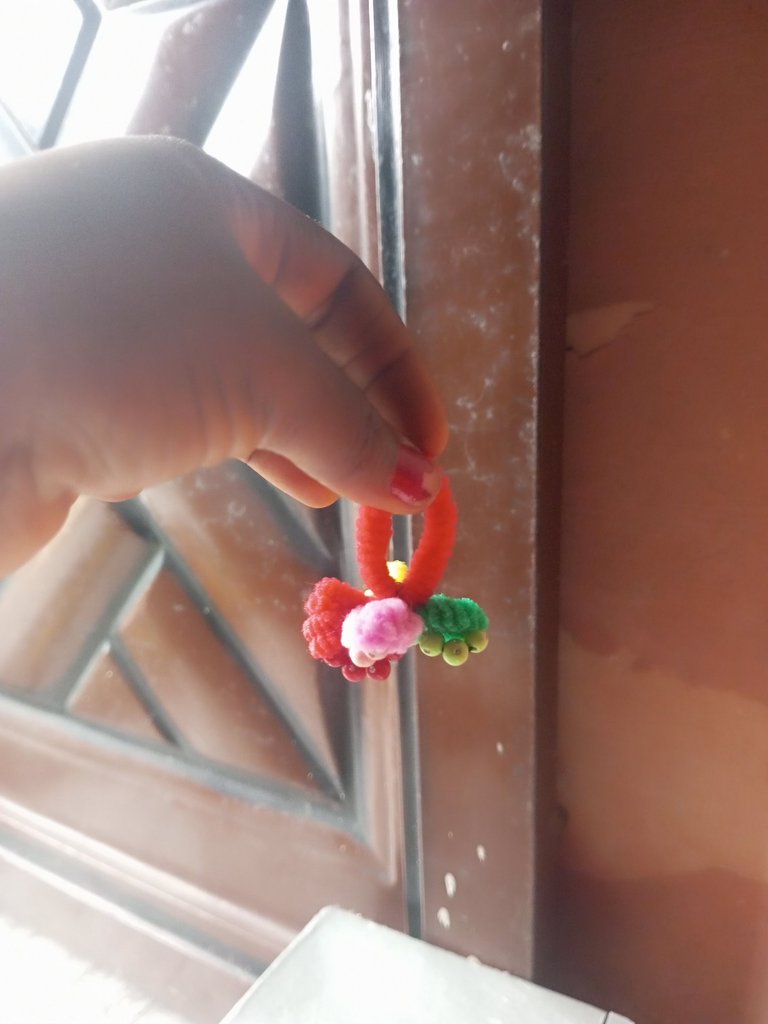
Next, with the help of the needle, I picked 4 beads and cross the needle to the other end of the elastic band.


To make it stronger, I passed the needle twice in each band.
I repeated same process until I passed the beads through the five bands.
Then, just at the middle of the bands, following the back side, I placed the remaining elastic band. With the help of the needle, I stitched or attached an atom of the remaining elastic band together with the one I designed. See what I mean here.

Wow wow wow 😮 😮 😳 😳 😳 😳
Our elastic wrist band is ready!!!
Lets wear it!!


So cute 🥰 🥰. I like it.
Although it is mainly for the wrist, yet, one can as well wear it as ring. Either ways works.


I so much like the wristband. Do you know that one can hardly detect that i made the wrist bangle with elastic bands because of how unique it looks. I am going to rock my wrist bangle.
Following my tutorial, you can as well produce yours.
Thanks for reading my bangle tutorial.
I appreciate. If you have any question, pour it out. I am ready to provide the needed answer.
Byeeee.
Sending Ecency love your way, thanks for using Ecency.

Thanks. Ecency app is very easy to navigate and as well fast. I like this app.
It is colorful, nice, and sweet. It looks fabulous. It looks good on you. Great job! Thanks!
selected by @rezoanulvibes
Wow, this is encouraging 🙏
I highly appreciate your commendation.
Thanks 👍
Wow what an interesting diy project 😆 so cool to have creative projects. I miss having extra time for creative work too. Thank you for sharing this with us. Happy midweek!
Made in Canva
!ALIVE
_
This post has been curated by the Alive And Thriving Team, we curate good content in the We Are Alive Tribe that is on topic for #aliveandthriving, and it's included in our daily curation report on @aliveandthriving, plus @youarealive is following our Curation Trail.