Tutorial: configurar y entender vimm desde cero [texto esp - eng]
Hola gente ¿Cómo están?
Hoy les traigo un tutorial sobre una de las frontiers de hive que a mí me han empezado a emocionar muchísimo ya que se trata de una página web donde podemos hacer transmisiones en directo y está conectada totalmente con hive.
Esta web tiene por nombre Vimm y tiene una función muy similar a la conocida twich de la web 2.0 que aunque tiene métodos de micro pago no está conectada a una blockchain por lo que no se considera una web 3
Bien dada esta pequeña introducción le mostraré como en base a una cuenta de hive nos conectamos a esta web en particular.
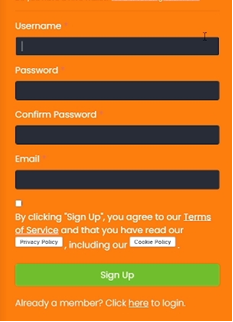
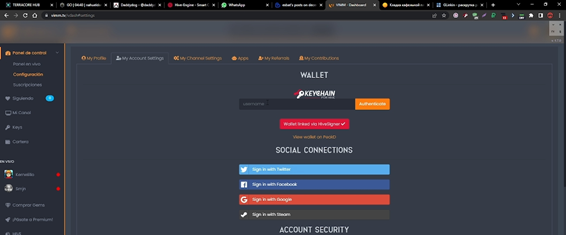
Bien lo primero que debemos hacer es crear una cuenta con la opción sing up y nos mostrará esta planilla que debemos llenar, aquí decidiremos nuestro nombre de usuario y colocaremos una contraseña.
Hello everyone, how are you?
Today I bring you a tutorial on one of the hive frontiers that has started to excite me a lot because it is a website where we can do live broadcasts and it is completely connected to hive.
This website is called Vimm and it has a very similar function to the well-known twich of web 2.0 that although it has micro payment methods it is not connected to a blockchain so it is not considered a web 3
Well given this small introduction I will show you how based on a hive account we connect to this particular website.
The first thing we must do is create an account with the sing up option and it will show us this form that we must fill out, here we will decide our username and we will place a password.
.
.
.
Una vez creemos la cuenta nos llegará un correo de confirmación, este contiene un link al que debemos darle click y nos abrirá el sitio web nuevamente.
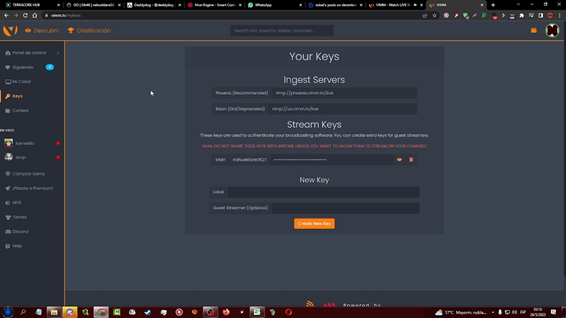
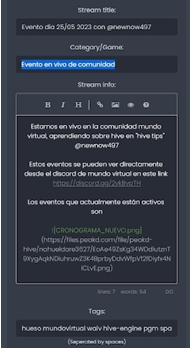
Ahora una vez creado el perfil debemos configurar la transmisión para esto iremos al sector donde dice keys y allí copiaremos el servidor y la key para poder configurar nuestro obs o su programa de transmisión de preferencia, yo mostraré todo desde obs ya que es el software que utilizo habitualmente.
Once we create the account, we will receive a confirmation email that contains a link. We must click on the link, which will open the website again.
Now that the profile is created, we must set up the transmission. To do this, we will go to the "keys" section and copy the server and key information there so we can configure our OBS or other preferred transmission program. I will show everything using OBS since it is the software I usually use.

Una vez hecho esto podemos ajustar en la opción salida los ajustes para transmitir. Yo aconsejo no poner un bitrate mayor a 2500 ni menor a 1500 para que la calidad del video no sea tan mala pero que tampoco tengamos tantos problemas de micro cortes en la transmisión.
Estos son los ajustes que yo uso actualmente.
Once this is done we can adjust the output settings to stream. I advise not to put a bitrate higher than 2500 or lower than 1500 so that the video quality is not so bad but we do not have so many problems with micro cuts in the transmission.
These are the settings I use currently.
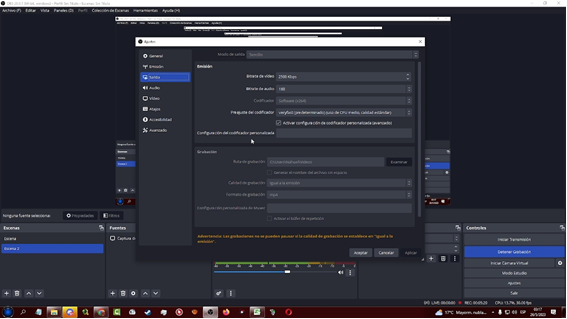
Es importante ir haciendo pruebas porque puede que estos ajustes no se amolden a su conexión o a su pc por lo que ir bajando o subiendo la calidad puede ser importante para ir haciendo ajustes al momento de transmitir.
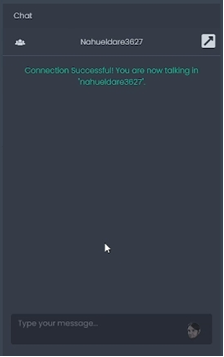
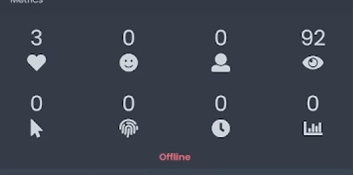
Ahora que ya hemos configurado nuestra transmisión veremos el panel en vivo, este panel nos deja ver los mensajes que se estén mandando durante la trasmisión en este panel.
It's important to do tests because these settings may not fit your connection or your pc, so going down or up the quality can be important to make adjustments when broadcasting.
Now that we have configured our transmission we will see the live panel, this panel lets us see the messages that are being sent during the broadcast in this panel.
.
Y bien una vez todo esté configurado simplemente es iniciar la transmisión en obs y dar clic en el panel en vivo donde dice publicar en hive, y empezar a transmitir, los streemers mas dedicados saben tener dos pantallas para poder ir siguiendo los mensajes en vivo y poder trabajar a la vez, yo actualmente tengo solo una pantalla por lo que los mensajes en vivo que voy leyendo son solo en el discord.
Espero que este post les haya sido útil y que pueda verlos en un nuevo video, post o tutorial. Muchas gracias por leerme y ver el video. :*
And well, once everything is configured, it's simply starting the transmission in obs and clicking on the live panel where it says publish in hive, and start streaming, the most dedicated streemers know how to have two screens to be able to follow the messages live and work at the same time, I currently have only one screen so the messages live that I am reading are only in discord.
I hope this post has been useful to you and that you can see me in a new video, post or tutorial. Thank you very much for reading and watching the video. :*
Translated and formatted with Hive Translator by @noakmilo.
▶️ 3Speak
!MEME
Credit: arthursiq5
Earn Crypto for your Memes @ HiveMe.me!
¡Felicitaciones!
Estás participando para optar a la mención especial que se efectuará el domingo 28 de mayo del 2023 a las 8:00 pm (hora de Venezuela), gracias a la cual el autor del artículo seleccionado recibirá la cantidad de 1 HIVE transferida a su cuenta.
¡También has recibido 1 ENTROKEN! El token del PROYECTO ENTROPÍA impulsado por la plataforma Steem-Engine.
1. Invierte en el PROYECTO ENTROPÍA y recibe ganancias semanalmente. Entra aquí para más información.
2. Contáctanos en Discord: https://discord.gg/hkCjFeb
3. Suscríbete a nuestra COMUNIDAD y apoya al trail de @Entropia y así podrás ganar recompensas de curación de forma automática. Entra aquí para más información sobre nuestro trail.
4. Visita nuestro canal de Youtube.
Atentamente
El equipo de curación del PROYECTO ENTROPÍA
Excelente tutorial ! Gracias por compartirlo con nosotros. Saludos.
Post votado por la Curación de la Comunidad de Mundo Virtual. Recibes algunos Huesos
Te invitamos a que conozcas nuestra Comunidad de Hive